4.29.2011

Let's Talk Patterns

Shall we?  My grandma taught me to crochet when I was 6 years old but she never taught me to read a pattern.  By 5th grade I'd crocheted sweaters, leg warmers and more all by making it up as I went along.  Around 3rd grade I used my old curtains and hand sewed a dress that despite my mom's protests, I wore to church.  So, in late elementary school and middle school my mom taught me to sew.  She attempted to teach me to read a sewing pattern.  My aunt taught me more about sewing and actually designed smocked dresses and patterns.

But, the damage was done, I'd already taught myself to look at the end product and figure out the steps in between.  Trust me, this really comes in handy most of the time, however, I can get pretty frustrated with myself when I am trying to go by a pattern.  Since last summer I have actually been trying to follow patterns more closely when I m using them because I would love to design my own patterns some day.

Why am I telling you all this?  Well, I got the opportunity to be a pattern tester for Jenny over at Seamingly Smitten!  It was so much fun to try out a pattern for her and I must say, it is a great pattern!  She said it would take a beginner sewer about an hour and a half.  I forgot to actually time myself, but I would say it took me a bit under an hour, in between making dinner all with the help of my trusty three-year-old assistant.  Best part is I have something new for myself to wear today, which is great because we are supposed to have awesome weather (finally).

So, here is the pattern I tried... The Laurie Clair Tunic

How cute is her sister, Laurie?!?!?  I so totally wish I could live down the street from my sister(s), they are sooooooooo lucky.  Want to see how mine turned out?
Excuse the plunger... It's a clean one since O-man uses it to play "plunger basketball" but we still put it back in the bathroom!
Here it is with a cardi over it, it's going to be nice, but it's only about 60 degrees right now so I'm sportin' the cardi until it gets warmer.
Please bear with the self photos, I've promised Jenny better ones but it will have to be once Tasha and JuneBug get home from school, O-man's photography skills leave much to be desired!

This pattern hasn't been released yet, but Jenny has some other darling ones, and based on the ease and details in this pattern, I'm sure her others are just as great.  You can get them on etsy or at You Can Make This.  I should also mention, I had everything on hand to make this so I got to do a bit more stashbusting too!

I said patterns earlier, plural.... well, I recently purchased a few of Ashley's patterns from Lil Blue Boo.  I have wanted to for quite a while now and I must say, I'm wishing I had purchased them sooner.  I've already made a few Sienna dresses for the girls and have lots of pieces cut for more.  I will get some pictures of the girls in them over the weekend.  The Sienna pattern actually only goes to a size 6, so I had to make some adjustments for my tall girls, but more on that later.

These ladies are both so talented, maybe someday I'll join the ranks of "designer" and have patterns of my own... anything in particular you want to see?

Peace be with you,

4.28.2011

And Gosh-Darnit, People Like Me!

Because I'm good enough, I'm smart enough... sorry, couldn't help quoting Jack Handy from those great old SNL episodes of Deep Thoughts!

I have to say, I get so excited to log onto my blog and see that I have new followers!  When I first started this I knew I was guaranteed to have at least 2 followers (my FlyBuddies, you know who you are), but to be over 100 followers in just a few months is so exciting for me.  It makes me smile :).  Oh wait, I knew I'd have 3 followers, my SisterBaby was another one of my first followers.  I don't remember who you are, but the first time I got a follower that I didn't know at all left me completely giddy all day!

Since I have a marketing background, I'm a little obsessed with where my readers come from.  Boy, was I amazed to see it's from all over the world.  I also get a kick out of what posts are most viewed, IE, most popular.  My geeky side coming out a bit there.

I want to thank you all for following me and totally making my day.  When you leave comments, they go straight to my phone so I get to see them right away, I so love that little beep my phone makes.  I get a lot of my inspiration from other bloggers but if I've inspired you to make something, or you've done one of my tutorials, please e-mail me pictures.  I'd get a huge kick out of featuring you or doing a blog swap!

Today we are supposed to get major rain, so I'll be inside sewing my little heart out.  My girls have made some requests and I've got several things in need of finishing.  I promise pictures tomorrow!

Peace be with you,

4.27.2011

WIMTWW: Mens Shirt Refashion

Prior to actually having a blog I followed quite a few and many of them inspired my interest in blogging and upcycling clothes.  This is a shirt I made late last summer but actually only finished this week!  Since I did it pre-blogging I don't have a tutorial of it but I will give you the basics.  Don't mind the 7 year old's photography skills!

Starting with a too large men's shirt, I removed the arms and collar at the seams.  I just cut them off carefully.  Then I took the sides in to give it a more fitted shape.  Using the sleeves and extra fabric from the sides I made and attached a ruffle to either side of the center buttons.  I also made a waist tie.  To finish off the edges where the collar and sleeves were cut off, I simply zig zaged with coordinating thread right at the edge.

It is quite comfortable and a bit nicer than an old t-shirt.  I got the idea from an Anthropologie shirt that is no longer available.

I will be linking up to some of these parties this week, like http://todayscreativeblog.net/linky-party/!

4.26.2011

Button for your thought?

I have a lot of buttons.  A LOT.  Some came from friends who know I like to sew and more came from a large tin that was my grandmother's.  I consolidated all the random containers into one large one however digging through that bin became a bit daunting.  I found the solution in a bottle!

I went through a bit of a Starbucks frapachino binge and saved all the bottles.  The kids helped me sort them in rainbow colors.  I spray painted the lids in a robins egg blue to coordinate with my craft space.  Now they look pretty enough to leave out on display.  It is much easier to find ones that work with my project this way too!
Too bad this is only some of them!

I'll be linking up to some of these parties this week, like Orgjunkie

4.25.2011

Stash Busting Give-a-way Winner

And the winner is:

Kassandra said...

I love Avon!!! My favorite product are the 8 in 1 eye palette's. I love them!

Congratulations, I'll be e-mailing you shortly, you will have 48 hours to respond before I pick a new winner!  Thanks so much everyone!!!  Don't forget to enter my Blog Hop Give-a-way, there is a link at the top of the page.

If you would like to be featured and offer a give-a-way on Domestic Deadline, please contact me
Peace be with you,

Freezer Cooking: Meatball Madness

My family loves homemade meatballs, but I despise making them, seriously, I can't handle touching raw meat.  When I actually give in and make them, I make tons and fill my freezer.  Over the weekend when I ran to the grocery store to pick up the makings of our Easter dinner, lean ground beef was buy one get one free.  Ground turkey and organic spinach was also on sale... my three main ingredients, score!

I try to sneak some extra veggies into pretty much everything, in the past I've used frozen chopped spinach but since spinach will hopefully grow in our garden this year, I wanted to try making it with fresh.  Don't they look yummy?
Want to stock your freezer up?  Here's my recipe:
  • 3 lbs of 93% lean ground beef (I prefer organic, grass-fed)
  • 1 package ground turkey (I find it in 20 oz packages by me)
  • 11 oz organic baby spinach, chopped
  • 2 eggs
  • 1-2 cups oatmeal
  • 1 chopped onion
  • 3 Tablespoons chopped garlic
  • salt, pepper, basil and oregano to taste
Mash it all together in a huge bowl.  Turns out JuneBug didn't mind doing this at all and happily formed most of the meatballs for me!  I make them about 1/8th of a cup and bake for 15 minutes in a 450 oven.  Since I like to cook once and eat multiple times, I kept about 20 of them warm in some pasta sauce while our noodles cooked.  The other 140 that we made were cooled and then consumed all my Tupperware containers in groups of 20 (an amount that I have determined feeds all 5 of us with a box of whole wheat penne, leaving one serving left for IronFish for his lunch the next day).

Mondays in our house are typically pasta night, alternating between cheese raviolis and penne with meatballs.  On meatball days I toss the frozen meatballs into my crock pot with marinara sauce (or whatever pasta sauce you like) and leave it on low all day.  If the sauce seems to get too dry add a bit of water occasionally.  The house smells awesome and all I have to do is boil water for the whole wheat penne!

Remember how I said the meat was buy one get one free?  I actually doubled this recipe but when I ran out of containers for my meatballs, I still had enough to make 3 meatloafs!  I freeze my meatloaf uncooked, so I didn't take a picture of it.  I'll share that recipe too:
  • Whatever is left of meatball mix (I probably had 2.5lbs of it)
  • 2-4 diced tomatoes or 1-2 cans of chopped tomatoes (I'm trying to use up my inventory of canned tomatoes and move to using fresh or jarred... whole other story)
  • 1/2 cup of parmigiana cheese (or more if you like)
I try not to use disposable plastic bags or containers or anything that will end up in a landfill.  I like to put my meatloaf in glass bread pans but they don't have lids and I only have two, so when I have to break down and use something disposable, I try to still go as environmentally as possible.  I've found a layer of biodegradable parchment and then a layer of recycled aluminum foil work:
The best part about meatloaf in my freezer is easily tossing it into my crock pot in the morning and letting it go until it's dinner time!  When frozen in a pan, just put the pan straight into the crock pot and put a bit of water around the pan in the crock pot.  Works like a charm!  In the past whenever I made meatloaf, even if it wasn't frozen, it always seemed to take 10 times longer than I thought it would to cook all the way through.  Ever since I learned the crock pot trick, our meatloaf is always ready when we are for dinner (takes about 6-8 hours on low, but I have also done it in 4 hours on high).

I spent $28 on the meat, turkey, spinach and onion ($13 in savings).  I probably used $5 worth of supplies I had in my pantry already.  Eleven meals for five people for $3 each is pretty good in my opinion.  Whole wheat pasta is about $1 a box here and I usually add a veggie as a side to meatloaf, maybe potatoes or rice also bringing each dinner to $5 or less and there is almost always enough left overs for a lunch for my husband.  I'm happy!

I'll be linking up to these Monday parties!
Peace be with you,

4.24.2011

Hoppy Easter Everybunny

He has risen!  I do hope you are enjoying your Easter, it is beautiful and sunny here and our turkey is already cooking.  Shortly I'll be making my all time favorite non-chocolate food: Aunt Bettie's Potatoes.  I'd make them everyday if didn't use so much cream (which is what makes them so darn yummy!).

Being the slacker mom that I am, we dyed our Easter eggs today.  I learned long ago not to have real eggs as a part of the egg hunt, so dying the eggs is really just for the fun.  Thanks to Robin over at The T-Shirt Diaries, I didn't have to worry about spending money on those dye tablets.  The kids colored the eggs with crayons first and then we dipped them in the dye.  Don't they look pretty?
Peace be with you,

4.22.2011

Earth Day Blog Hop

And so Stashbusting ends... I'm still working on a huge project with tons of my scraps and I'm planning to keep going and not buying craft supplies until at least Mother's Day, because the craft area is still not in real shape yet!

But the most exciting thing is today is Earth Day and that means my first Earth Day Blog Hop!!!!!
*** Please note:  If you want the full Hop experience, you need to start at A Home Made by Kiki, trust me, it's worth it! ***
If this is your first time visiting, we'd like to welcome you to Domestic Deadline (by we, I mean my various personalities)!  Please feel free to check out my little piece of blogland and leave nice comments if you find something you like ;)  If you're a regular, well, you're welcome too (you can also look around and leave nice comments)!

So, what's this blog hop all about, you ask?  Well... good things for the environment of course... keep reading and you can win some of those good things for the environment... and a little dirty talk...

Did that get your attention?  All right, get your head out of the toilet, I didn't mean that kind of dirty talk!  I meant this kind of dirty talk:
Yup, I let it go for a few weeks just for this blog hop.  Why?  Traditionally, if I let the toilet get this bad I'd have to give in to a toilet bowl cleaner with bleach in it and still scrub with all my might.  But a few weeks back I found out about Shaklee which offers non-toxic and natural cleaning products that are safe, powerful, Earth friendly and just plain SMART! 

I put two drops of Basic H2 into the bowl and swirled it around, let it sit for a few minutes (I would have done that with bleach based products too) and much to my surprise, not much muscle power was needed to  get that nasty ring off.

But I couldn't just stop there.  I wiped down the rest of the toilet with one Basic H2 wipe.  When cleaning wipes first entered the market, I jumped on the band-wagon, they made cleaning that much faster.  It didn't take too long for me to realize how many were ending up in a land fill and returned to a spray and washable cleaning rags.  The wipes made it so much easier for me to get the girls to help with bathroom cleaning, but there was one for the mirror, a different one (or three when the girls clean) for the counter and another one or two for the toilet.  The Basic H2 wipes have solved this dilemma in our house, currently reffered to as magic wipes by the girls.  They were so relieved to be able to use wipes again, and surprised to find they could start with the mirror, move to the counter and finish with the toilet all with one wipe (that's why they are magic).
See, now the whole toilet is nice and clean and no harmful chemicals were used in the process, that make me happy.
So are you interested in trying Shaklee and cleaning your home with clean cleaning supplies?  Here are the opportunities:
  1. Starting at A Home Made by Kiki, collect the letters by hoping from one blog to the next.  Once you have collected all the letters, e-mail the phrase to healthy-solutions@hotmail.com to be entered into the drawing for the GRAND PRIZE! (by April 30th at midnight ET).
  2. Become a follower of Domestic Deadline AND A Home Made by Kiki via Google Friend Connect, leave me a comment for an entry to win a Basic H2 sample (by April 30th at midnight ET, you MUST be following both of our blogs).
  3. If you can't wait to see if you win, Shaklee is having an Earth Day special, FREE membership with any $30 purchase AND other great specials that you can find out about by sending an email to healthy-solutions@hotmail.com
  4. Check out my Stashbusting Give-A-Way for the opportunity to win some other great stuff (ends at midnight ET today, April 22nd, 2011)
Ready to hop and win?  The letters you need are SH and the next blog is Momof3dolls.blogspot.com

Peace be with you,

4.21.2011

Mission Organization: Kitchen

Yesterday I decided to do a little deep cleaning of my kitchen.  Actually, what started it was I decided to revisit this area:
Look how pretty it looked!  Almost 3 months later, it was still better than it used to be, but still not great.  I figured out why.... most of the stuff that I thought should be there hasn't moved!  So I moved the chargers to another place, threw some more stuff out and was left with just a few things.  Which made realize that the few things left could probably go someplace else...

So I tackled my upper corner cabinet.   Sorry, no before, but it was pretty bad.  But look how nice it looks now:
It's hard to tell in the picture, but it is actually very organized.  Medicines and vitamins are grouped with like, a few Tupperware containers of things I regularly use are in there, and a few things my girls need to reach are now on the lower shelf so they don't have to climb onto the counter to reach (don't worry, they are old enough to go into this cabinet and not take any medicines they shouldn't!).

Yeah, my counters are pretty and clean, I have some more things to donate, and got rid of things I didn't need (including expired meds and vitamins!).  My floors on the other hand.... guess I better go clean them now...

Peace be with you,

4.19.2011

WIMTWW: Cleaning Up Nice!

This past weekend my husband and I went to a wedding.  It was held at an amazing old mansion in Pennsylvania and in typical Emily fashion, I started on my outfit the night before.  I originally had plans to make a whole dress from the fabric of an old bridesmaid dress.  However, Friday morning started around 4 am with a stomach virus for O-man.  Since I wasn't able to actually do much, I used my time to mentally rethink my plan... make an outfit quicker and easier in a few late nght hours versus the several hours during the day I'd planned.

Enter a few other old bridesmaid dresses (I have had 5 hanging in my closet for as many as 10 years, couldn't bear to just donate them...).  I thought I'd taken before pictures, but I'm sure you all know how days with sick kids goes... I thought I'd done a lot of things that day!

Here's what I did:
  • Shortened the hemline consdierably of the skirt from one dress.  I also let it out, it was pre-children!
  • Removed the top portion of another dress.  This was originally a two piece to begin with so it wasn't hard.  I ordered that dress prior to finding out I was pregnant... traded with another bridesmaid who's was waaaayyy too big on her when I found out I was pregnant... had it altered the week before the wedding at 5 1/2 months of pregnancy.  The woman who altered it attached the two pieces together because it wasn't laying right with my rapidly expanding second pregnancy belly.
  • Added a sash from another dressy outfit, but for the life of me can't remember which one, but I remember removing it from something!
The results:
 I had the wrap in the same color as the sash since it was a chilly day and a purse in the teal blue as well.
I did my hair all up, added some awesome Lia Sophia jewelry, and a great makeup job if I do say so myself.  Hmmm, night out with the hubby, kids at home with a sitter... bet you are wondering why I don't have a picture of me in it, right?

Two words....................... Stomach Virus!  Yup, hit me between the first and second course!  Luckily, I made it to the bathroom in time.  Thanks to my Elkins Estate Souvineer Trash Can, we made it the hour home without ruining my fancy duds...

Peace be with you,

Tough Call... and Amen for Good Neighbors!

I learned long before my children were even born to act calmly for any and all injuries (helps to be a teenager when your youngest sister is born).  If mom is calm, it is easier to judge the severity of the situation, since most boo-boos only need a kiss.

That being said, this is how yesterday afternoon played out in my house...
Me: "Where are you going now, just sit down and take a rest."
O-man: "Nope, not tired...(trip and fall)... aaahhhhhhhhh"
Me: (Sigh) "JuneBug, hand him to me, please"
JuneBug:  After handing him to me, "Mom, the back of his head is bleeding!"
O-man: still blood curdling screams, as close to hysterical as I've ever seen him
Me:  "OK, can someone grab me a napkin?" (Holy $hit, there is a pool of blood in my hand, stay calm, head wounds always bleed more than others.  Oh, the napkin is soaked too...)
Me: "Um, I'm going to need a kitchen towel.  Girls, why don't you go over to Grandma Peggy's (the neighbors)."  (Stay calm, find phone, wallet, car keys...)
Nurse at Doctor's Office: "Since it's the end of the day, if it needs an x-ray, we'd have to send you over to the hospital anyways.  I agree, it's better safe than sorry for a head wound."

At this point I was already in the car, told IronFish where the girls were, O-man's situation and where we were headed.  My peace of mind was that I didn't have to worry about the girls at all, it's good to have neighbors you can count on!

I spent the car ride trying to get him to talk to me since I was having trouble telling if he was loosing conciousness or just falling asleep...  That was actually when I got most nervous, he had his head turned so I coudn't see him well and would only say his head hurt if he moved.

Fast forward to today, he's got a lump, the ER cleaned him up, said he was fine and told me to watch for signs of a concussion, but they didn't think he had one.  We lost a t-shirt and some time but ultimately it was one of those tough calls where you have to decide if quick action is needed or if a wait and see attitued is better. 

He's running around the house now with a bucket on his head...
Peace be with you,

4.18.2011

Easter Decorations

Easter is less than a week away.  The kids are on Spring Break here and this year we will be home.   When the girls got home from school on Friday, we decided to make a few decorations, stashbusting style!  Nothing we did is new to blogland, most of what we did is copied from something we've seen but we had fun and I promised the girls I would show it off.  (I'd give credit, but many people out there have their own versions, it would take forever to go back and find all the sites I've seen similar things on!)

Here's what we used that was all on hand:  Mini and regular sized Styrofoam eggs, fabric strips, glass jars, old book pages, yarn, mod podge and glass candle holders.  I did buy blue spray paint, but I needed it to finish two other projects, so the $2.50 the mini can cost was well worth it.  Some of the supplies I had bought shortly before stashbusting began, and of course didn't get to the project until now, but it's out of my stash!

Take a peek:
The girls had a lot of fun making the book page eggs, we have about 20 of them!  To make it easier on them, I had them wet the paper and then paint mod podge over top.  I did smooth them a bit before they were dried.  I should go back and put another coat or two on them, but I probably will just find another project to do instead!
Sorry, the egg in the middle was something I picked up on clearance a few years ago, but it would be really easy to make if it hadn't been about 50cents!  I just liked the way it looks with the mini egg tree and the rolled rosette tree.  What doesn't show up in the picture is that we covered the tree with a course yarn about the same color as the nest on the large egg.  I did it that way to coordinate the three pieces together

Peace be with you,

4.15.2011

Earth Day Every Day

Not only is today the deadline to file your taxes but it is also one week until Earth Day!  Ok, maybe I'm a bit of a geek, but I feel taking care of the planet we live on is everyone's daily job.  If it takes a "holiday" to make some people remember it, I'll take it.

Earth Day is also the last day of The T-Shirt Diaries Spring Stashbusting Challenge.  I've done petty well but I'm going to be continuing to work through my stash for a few more weeks, that's for sure. 


Next Friday is also the last day to enter my Stash Busting Give-a-Way and earn $75+ in Avon products and more.
This Earth Day I will also be a part of the Earth Day Blog Hop hosted by Kristina over at A Home Made by Kiki

This will be a fun event to "meet" some different bloggers, "collect" something from each blog, enter each of our give-a-ways, and if you travel to all the blogs, be eligible for the awesome grand prize!

Peace be with you,

4.12.2011

Stash Busting Skirt

To say I have a lot of fabric is an understatement.  Most of it is less than a yard, mainly because I buy it before I have a project for it.  I am trying to change that habit, I haven't been in the fabric store since January (yeah me!).  I love to use remnants, I see it like a fabric puzzle and that's just exciting.

With the goal of depleting my fabric stash, I mixed several fat quarters of various hot pink batik and made this skirt:
It's very full and twirls nicely, which makes it a lot of fun.  I'm thinking of making some more, maybe with more contrast?

I'm also trying to figure out what to do with a few old bridesmaid dresses... Mod Cloth has a ton of fun party dresses, but I just can't decide what to do...

Peace be with you,

4.11.2011

Scrappy Shape Monsters Back by Popular Demand!

I am loving stashbusting even more than I expected!  IronFish informed me that our credit card bill for last month was amazing... just over half of what it typically is.  Staying out of stores has contributed to that, I'm sure.  Plus, I'm working on things I've planned on doing but hadden't gotten to yet.

Remember this yarn stash?
Well, that's only a small amount of my yarn stash!  But I usually carry yarn and a crochet hook with me where ever I go.  I've had quite a bit of interest in my Scrappy Shape Monsters that my children love so much.  JuneBug actually carries hers, Hapizoid the Trapizoid, in her backpack, a little secruity buddy that her friends think is cool and not babyish.

The random pieces I've been working on here and there came together last night and I was able to add 4 Scrappy Shape Monsters to my etsy shop!  All of which have just been hidden from me by O-man when I told them they weren't for him!!!!
Ok, I give up, the picture was not upside down and every time I try to rotate it, it still shows up upside down here!!!!  Grrrr.....

Peace be with you,

4.08.2011

How to Fill a Bean Bag Chair or Floor Puff for FREE!

Subtitle:  How to drive your husband crazy

If you saw my stashbusting tutorial for floor puffs, or cushions (my kids named them floor puffs), you may remember this picture:
My family room covered in 12 yards of patchwork goodness!!!  Well, here is the final result of all that:
Stacked up or spread out over the basement floor:
I did have two large bean bag chairs to reuse filling from, but we still needed more to fill them all nicely.  I've been asked where to get bean bag filling....  A quick swagseach resulted that it is easy to order it online, but spending money on Styrofoam pellets isn't in my budget.  Here are my solutions (and lessons learned from them):
  1. Break up Styrofoam packaging:  We've all gotten something that came with molded Styrofoam to protect it.  This just ends up in a landfill since at least around here, it isn't recyclable.  If your husband can't put up with the mess it causes for a few days, wait until he is out of town!!!  Breaking this stuff up is pretty easy, but makes a real mess and is time consuming if you are trying to fill as many as I did!  The kids and I broke it down as small as we possibly could but the little scraps fly all over the house.  I'm still finding it in rooms we weren't even in.  But after a few vacuuminga most of it can easily be caught.
  2. Old soft stuff:  This is a bit of a miscellaneous category.  I collected quite a bit of serger trimmings and sweater scraps that were too small to do anything else with.  I also found an old pillow that had seen better days and used the stuffing from that.  The other old thing I found was a few pillows I'd crocheted years ago out of really soft yarn.  They had gotten pretty matted down and weren't being used.  I simply started sipping it into small pieces and added some of this to each puff.
  3. Packing Peanuts:  This turned out to be the easiest method.  If I had started with this I would have just done this.  To get enough I suggest asking local friends to save it for you when they get a package since packing stores will charge for it.  Not only was it the easiest Styrofoam to break up, we ended up filling the bag with it whole and then dancing on the puff to break it up.
Ultimately, my 6 puffs have a combo of all three plus the filling from the two old bean bag chairs.  Next time I get packing peanuts I will probably add some to all the bags since I think it is what will smush down the fastest (based on how easy it was to break up).  I'm also going to continue to collect my serger trimmings and keep them out of a land fill.  I love bean bag chairs, the two old ones were mine in high school and I refilled them several times over the years.  It is almost an on going process, but I doubt I will need to break down Styrofoam packaging for a while, until they really need re-filling.  And yes, I'll wait until IronFish is out of town to do that again...

Peace be with you,

4.06.2011

WIMTWW: Dress to Tunic

I have a dress in my closet that I picked up at the thrift store last summer.  This one was actually long enough on me but I only wore it once.... why?  Well, I wore it to church on a nice summer day when we had a cook out after the service... One of the ladies took me aside and let me know I needed to stay in the shade... with the bright sunlight you could see right through my dress!!!

Back in the closet it went, until yesterday, that is.  Originally I was planning on another sweater refashion with this great coral cardi, also thrifted, but when looking for in my closet for some inspiration, I pulled out the see-thru dress and decided to use it.  I love the way this refashion turned out (and so did a lot of people, thanks for all the features!), I thought I'd do the same thing with the dress and coral cardi:
Starting with chopping off the bottom, I serged and hemmed it at a tunic length (I'm tall and short shirts are a pet peeve of mine, I have 3 kids, there is no reason for my belly to show!).
When I laid the sweater out to figure out how much of the skirt I would need to make a ruffle, I couldn't make up my mind for what exactly I wanted to do with it.  So I made a flower pin and quit!
The dress had a tie in the back, it worked OK on it, but my shiny, red leather belt worked even better!
Now I have a cute everyday outfit that will definitely get worn more than it did as a dress and another sweater out of my stash.  I also have a large piece of fabric to figure out what to do with now!  Maybe something for my girls...?

Peace be with you,

4.05.2011

Spring Sweater Refashion 3 - Tatertot Style!

Are you tired of my spring sweater refashions yet?  I hope not because I still have a few left!  This was supposed to be my What I Made to Wear Wednesday (WIMTWW) project last week but I didn't quite get it finished in time.  However, I did get it finished in time to wear to my nephew, Tatertot's, birthday party.  Kind of ironic since I used the tutorial over at Tatertots and Jello.  Here's my version:
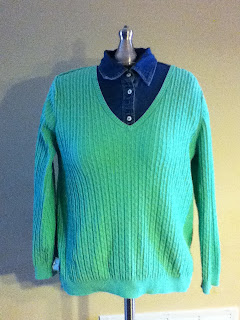
The denim is my mannequin, Marj, not what I would wear under it!  In the spirit of Stashbusting, I worked with fabric I already had on hand.  The ruffle actually has the minty color and the colors of the rosette flowers in it.  I would have loved to have a teal sweater (my favorite color) and a monotone color scheme like Jen, but I worked with the thrifted sweater I found ages ago and added to my stash.  Also, the yellow is not nearly as bright as it showed up in my photo, all the fabrics are pastelly and go together nicely.  My sister took a picture of me holding Tatertot at his party, if that one show the colors better, I'll add it.  Here is the XXL maternity sweater I started with:
I took the whole sweater in, even under the arms and cut it up the center, just like I did here.
Peace be with you,
Related Posts Plugin for WordPress, Blogger...