Showing posts with label Kids Style. Show all posts

4.20.2012

Super Hero Capes and Shop Update

It all started with my little guy's request, he was tired of asking me to tie his blankie around his neck and wanted a "real" cape.  Finding superhero sheets at the thrift store was a total score.  I love upcycling and the sheets are light weight so they flutter nicely in the wind.

Here's a fav pic of Super O and Super T a few weeks ago, the caped crusaders captured all the Easter Eggs their buckets could carry.  It was a great day for the good guys!
O-Man says his cape helps him fly much better than just his arms:
I made them reversible with their initial on one side and super hero on the flip.  O-man's is Batman and Tatertot's is Spiderman (yes, I realize Spiderman doesn't wear a cape, but that doesn't seem to matter to the pre-school aged fans). 
Plus, after constantly telling people they would be in my etsy shop soon, I can officially say, the Super Hero Capes are now available and  I'm currently offering free shipping on all capes!!!!

Peace be with you,

4.02.2012

A Tale of Two Shirts

I've been sorting and organizing lots of places in my house lately.  When I sort the kids clothes and change them for the season, I start thinking of great things to make for them.  The other week, the girls and I made a "To-Do" bin, each outfit I am to make for them has the materials needed and a post-it note with a quick sketch or notes on what my daughter wants me to do.

So, to make my mind stop coming up with more and more projects, I had to do a quick one and feel like I got at least one thing done before I head back to cleaning and organizing.  This one was super quick, only took as long as the oven took to warm up!

I started with these two shirts, two different manufactures, two different sizes.  Dead match for colors.
Their courtship was quick and they were married and photographed before dinner was even on the table!
Like how she can't stop watching TV long enough for me to take her picture?!?!?!  She tells me she loves it, so we're all happy.  Gotta love a quick upcycle!

Don't forget my give-a-way going on, you've got a great chance, no one's entered as of yet!

Plus, the super awesome Groupon Deal for Cold Stone Creamer is still going on!!!
Peace be with you,
 
My entry into Creative Me is sponsored by Appliances Online and Bosch Washing Machines

10.09.2011

Halloween Shop Update

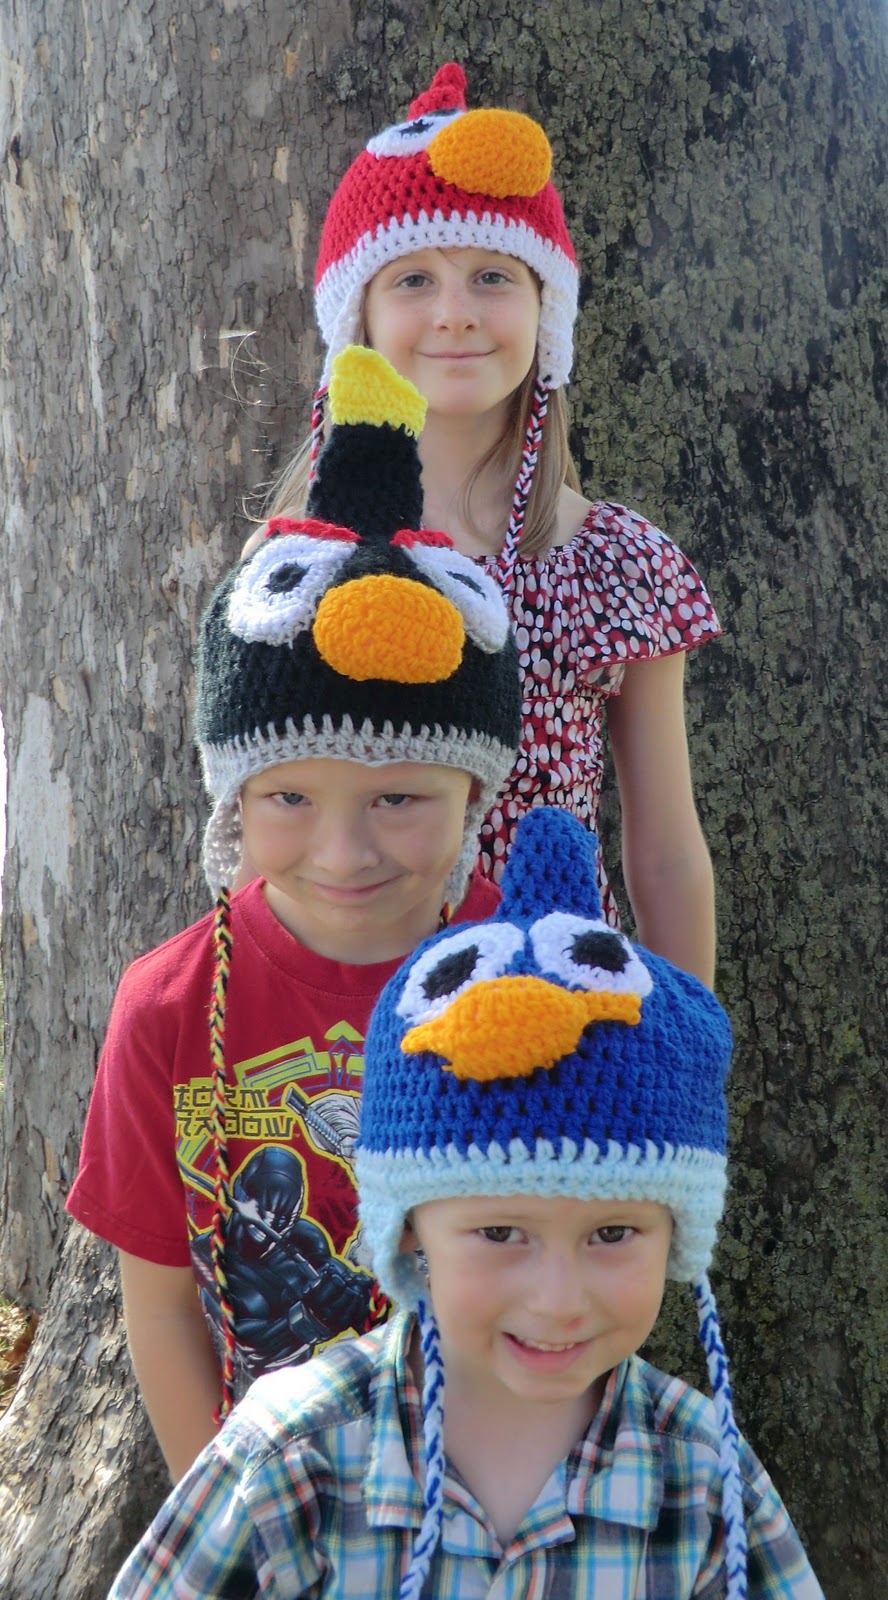
I have been crocheting my little heart out... well, my hands out at least!  Two weeks ago I decided to make hats for my "spares" whom have moved to Indiana.  I started with one red "Moody Fowl" hat which seems to have started a bit of an epidemic around here.  I have one for each of them and have taken orders for 6 more and have listed them in my etsy shop.
Seems "Moody Fowl" are popular with kids of all ages (from my 3 year old to my first order by a 21 year old!).  They turned out soft and warm with ear flaps to protect from wind and cold (reduce ear infections!).

I also worked on some fun Halloween dresses that the girls are hoping don't sell!  I'm a bit torn on that too since they look so darn cute in them, but of course I want others to enjoy them and I'm always making things for my girls.
I'm so excited to be donating a portion of all my proceeds to the Ella Jewell Foundation which supports neutropenia research and hopefully one day a cure for my sweet nephew.

Peace be with you,
 

I'll be linking up to some of these parties, stop by and check out the talent!

9.21.2011

September Stashbusting Style

The other week I did a guest post over at The T-Shirt Diaries if you missed it, here it is again!  Enjoy!
*     *     *     *     *
Greetings Stashbusters!  I'm so excited to be participating and grateful to Robin for hosting.  I'm Emily from Domestic Deadline and I see stashbusting as a way to take a different look at the supplies I already have on hand.  If you haven't guessed by now, I hoard fabric.  I can't pass up the remnant section at the craft store.  To me remnants and scraps can be put together like a fabric puzzle.  So, when my oldest asked for a bubble skirt after September 1st, it had to be done from my hoard stash!  There are several bubble skirt tutorials out there, and mine really isn't all that different... except for the fact that the fabric that met her red, white and blue requirements were a quarter of a yard or less!!!  This might work for a little one, but JuneBug, my 9-year-old is very skinny but fairly tall.  I'd like to introduce my

Fat Quarter Reversible Bubble Skirt

1.  Measure your recipient.  JuneBug has a 21 inch waist (and has for at least 3 years) and I like a length of 17 inches for skirts on her.  You will need 1 inch wide non roll elastic (waist size less 1 inch) and approximately 30 inches of 1/4 inch elastic (or in my case 1/8 inch was in the stash, went with it).  I'm assuming basic sewing knowledge here, but if you have any questions please ask!  My seam allowances are 1/4 inch

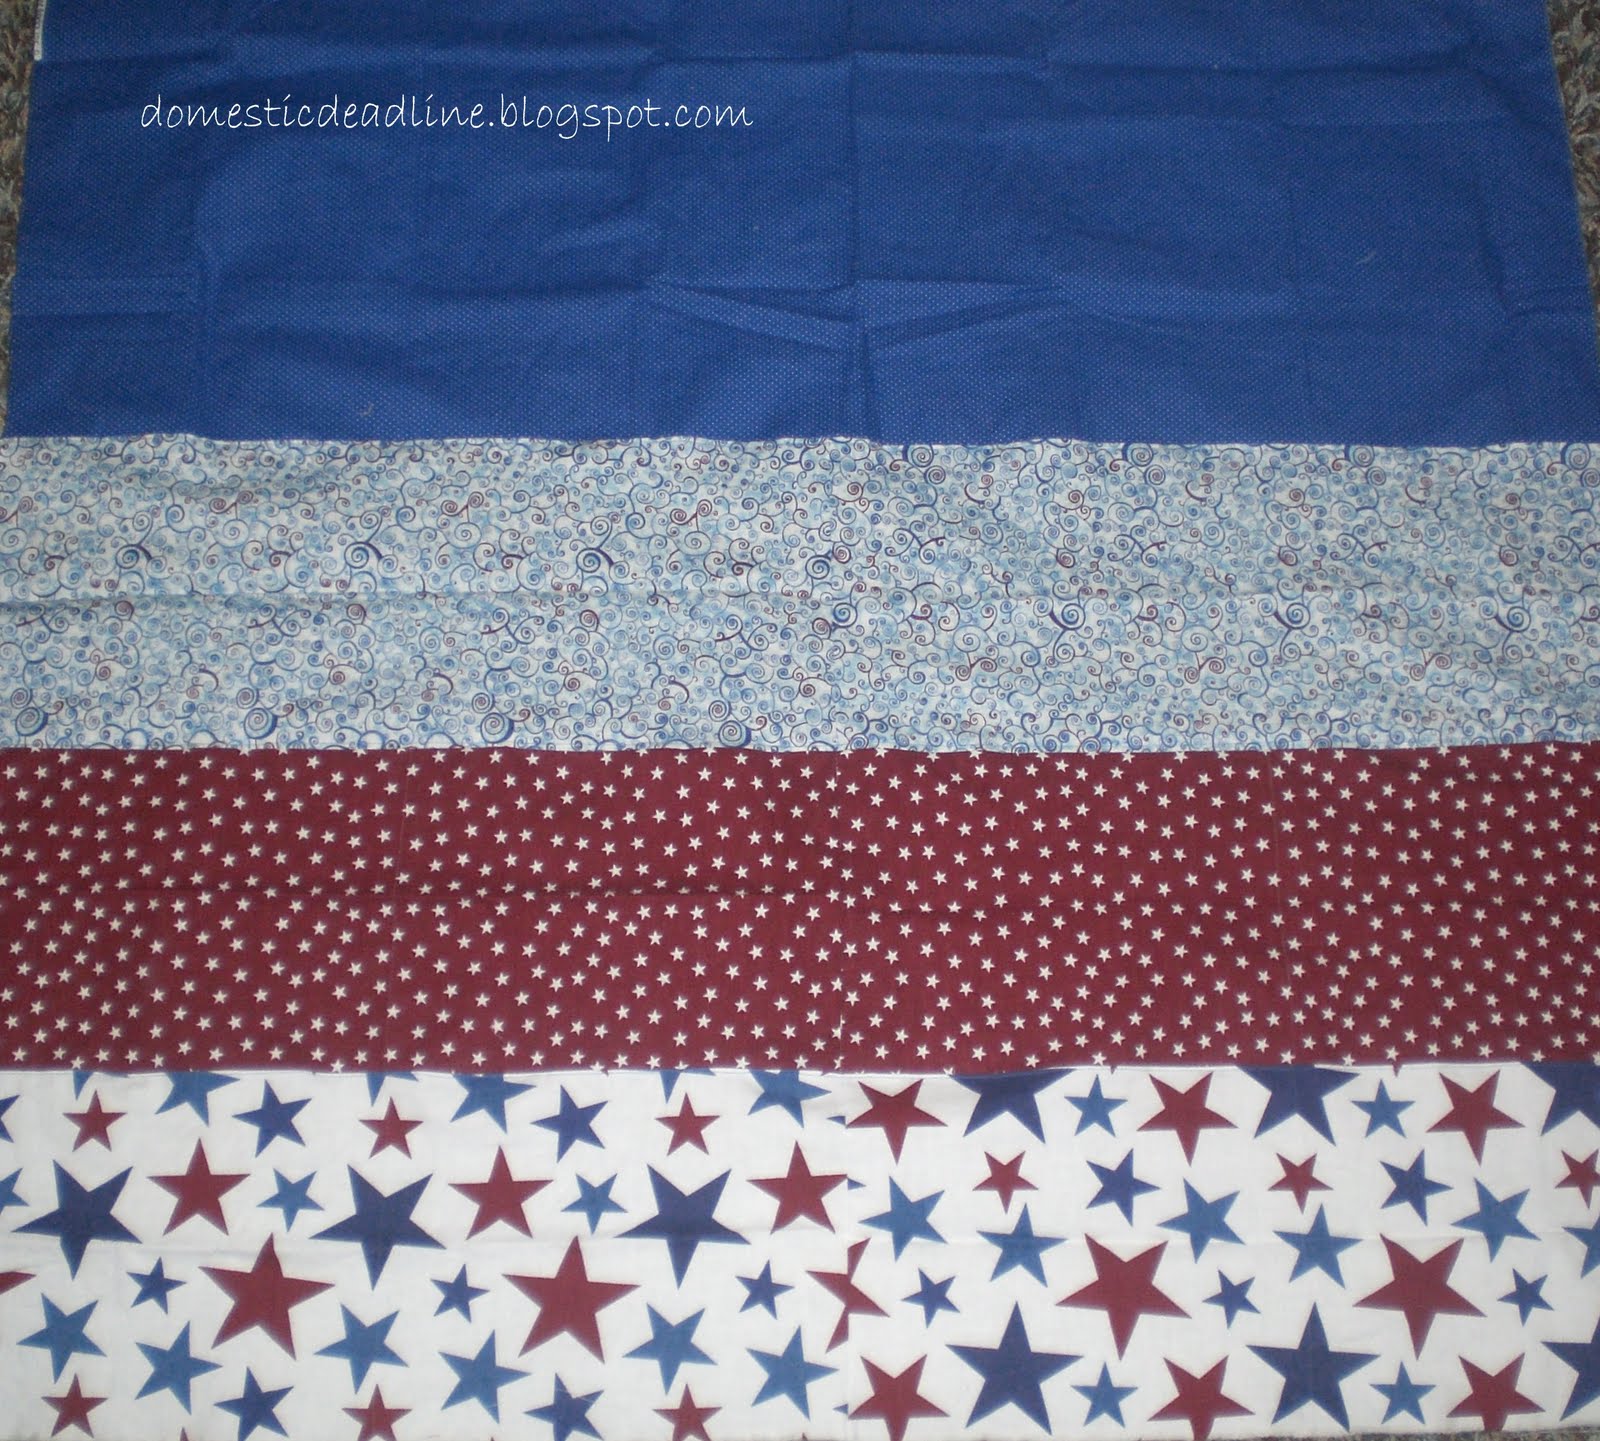
2.  Grab a few fat quarters in coordinating colors, I wanted mainly blue on one side (her fav color) and patriotic on the flip side.  When it comes to a traditional two color reversible bubble skirt I would use one piece that was standard width (about 44-45 inches selvage to selvage) with a length of 1.5 inches longer than my desired finished measurement (so for JuneBug, that would be 18.5 inches).  The second piece would be 3.5 inches longer than the first (21.5 in my case) *Note 18.5+21.5=40.  Sorry to be so wordy, but I figured I should explain the measurements so you understood how I pieced my fabric together.
3.  Cut those fat quarters down and sew them back up!  Fat quarters are typically 22x18 inches we need to turn them into about 44 inch long strips by whatever is left (would be about 9 inches, but apparently mine were partially used since I didn't have a full 18 inches, just go with it!).  Once I had strips of fabric that were (almost) 44 inches wide (give or take a bit of seam allowance), I sewed them all together, resulting in a 43 by 40* inches rectangle.  If you would like to top stitch, now is the time (yeah, just do it).
4.   Now we're going to sew that baby into a tube, sorry the above picture was the best I could do to show this, my photography skills aren't pro.
5.  Turn half of the tube onto itself, wrong sides in.  The swirly strip will be the bottom band on BOTH sides, the star pattern is the waist on both sides.  Iron a nice crisp crease into the bottom (my swirlies).
6A).  Just above the bottom edge, on the right side, we're going to sew almost all the way around (my scissors are acting as an arrow) wide enough to fit the 1/4 inch elastic.  6B).  Since you sewed almost all the way around, there should be an opening to feed the elastic through with a safety pin.  Please note, you have to reach in between the two layers since your finished piece will have no exposed raw edges.  6C).  Once your elastic is all the way through, decide how much you want the "bubble" to gather and sew the ends together.  Sew that opening closed.
7.  Congratulations you are almost done!  The last step is the waist band.  7A).  Fold over your waist band a quarter inch and iron.  Then fold it down and iron again, this time about 1.25 inches, covering the raw edges.  7B).  Stitch almost all the way around again, making a casing for your waist elastic.  Feed it through the opening, sew your elastic ends together and stitch the small opening closed.
8.  You're done!  If you work after the kids are in bed like me, leave it in her room to find it in the morning.  After you relish in her excitement, don't be too disappointed when she insists on wearing an old t-shirt with it, refuses to brush her hair again and just be glad she lets you take the pictures.  (Ignore the random waffle holding arm that tried to work his way into your picture).

Peace be with you,
 

I'll be linking up to some of these parties, stop by and check out the talent!

9.19.2011

Just When You Think You'll Go Crazy

Well, it's been a bit crazy over the past week.  I had all kinds of plans that went down the drain... literally!   We managed to survive the hurricane and record amounts of rain with a dry basement, but last Monday, on a beautiful sunny day with no rain in sight, our basement flooded.  Yup, the washing machine died.  Apparently it wasn't getting enough attention since the fridge had been leaking and we'd been looking into replacing it.  So, Tuesday was spent cleaning, moving and drying the contents of our basement.  Several hundred thousand dollars later, the replacements were delivered and we're back on track... except for all the displaced things that still need to be put away.

Despite the hassles, a few totally awesome things happened too.

First, I finished up my first official custom Harper N Co order!!!!!  I love my sisters and friends but getting a custom order from a complete stranger is just so awesome.  My customer's daughters' favorite colors are red, dark purple and dark pink... no pastels for this little lady.  The finished product will be shipped off this afternoon
Please excuse my kitchen floor and poor photo quality... not sure where I put the camera (this is from my phone) and the little photo space I'm attempted to use to learn to take better pictures has displaced toys in it.
Here is what I am most excited about, my awesome new labels!  Wonderful custom made iron in tag-less labels by Ragademalion on Etsy.  I love supporting other Etsy shops!  I got to select exactly the font I wanted from probably 100 choices and just a few days later received a biodegradable package in the mail filled with a beautiful baggie of my own labels and complete instructions for use.

Second, I got to spend Saturday with friends scrapbooking ALL day!  It was one of those charity events where you pay a fee, crop from 9am to 9pm, food provided and funds are raised for a cause.  Of course, there were raffles that I just had to enter.  After dinner, 40 some prizes were won by everyone but me.  I was a bit bummed, but that's the way it works when you drop your ticket in.  Plus, my friends won some nice things so I was happy for them.  Then they drew for the grand prize... which had it's own special tickets... and I WON!!!!!  Wanna know what I won?!?!?!?!
That's right, a Cricut!!!!!  I am still in shock.  It's a Cricut Expressions and came with 3 cartridges and vinyl samples in the bundle.  I can't wait to try it out.  I've only used one once or twice.  If you have one and have any tips for me, I'd love to hear them.  Any idea if I can use it to cut fabric?

Peace be with you,
 

I'll be linking up to some of these parties, stop by and check out the talent!
Related Posts Plugin for WordPress, Blogger...