Another day of Creating Christmas with The Girl Creative! I'm having so much fun with this, and I really hope you are too! Have you been checking out all the other lovely co-hosts? I hope you do, these ladies have some wonderful ideas to share. Check them out:
Que Linda Crafts, The Cottage Market, Love Lindsey, Domestic Mischief, Chicken Scratch, Love Sweet Love, Randee’s Organized Chaos, Musings of a Glamour Puss, Anastacia Knits, Southern Scraps, Modern Yet Old Fashioned, Broken Treasures, Alyssabeth’s, Domestic Deadline, Life on Walnut Street, 52 Mantels, The Glamorous Life
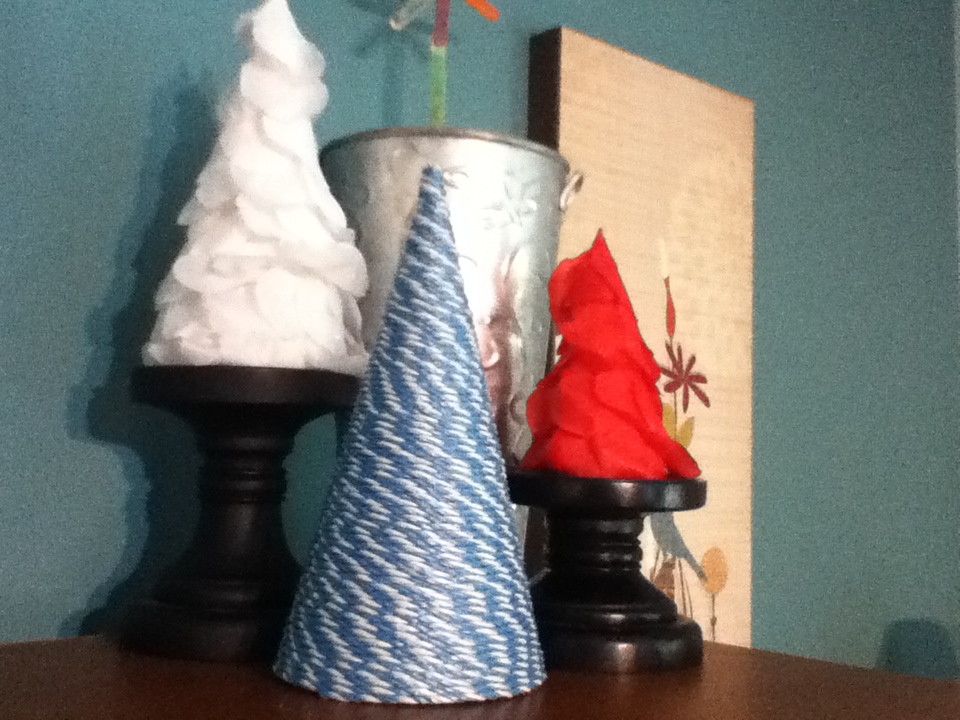
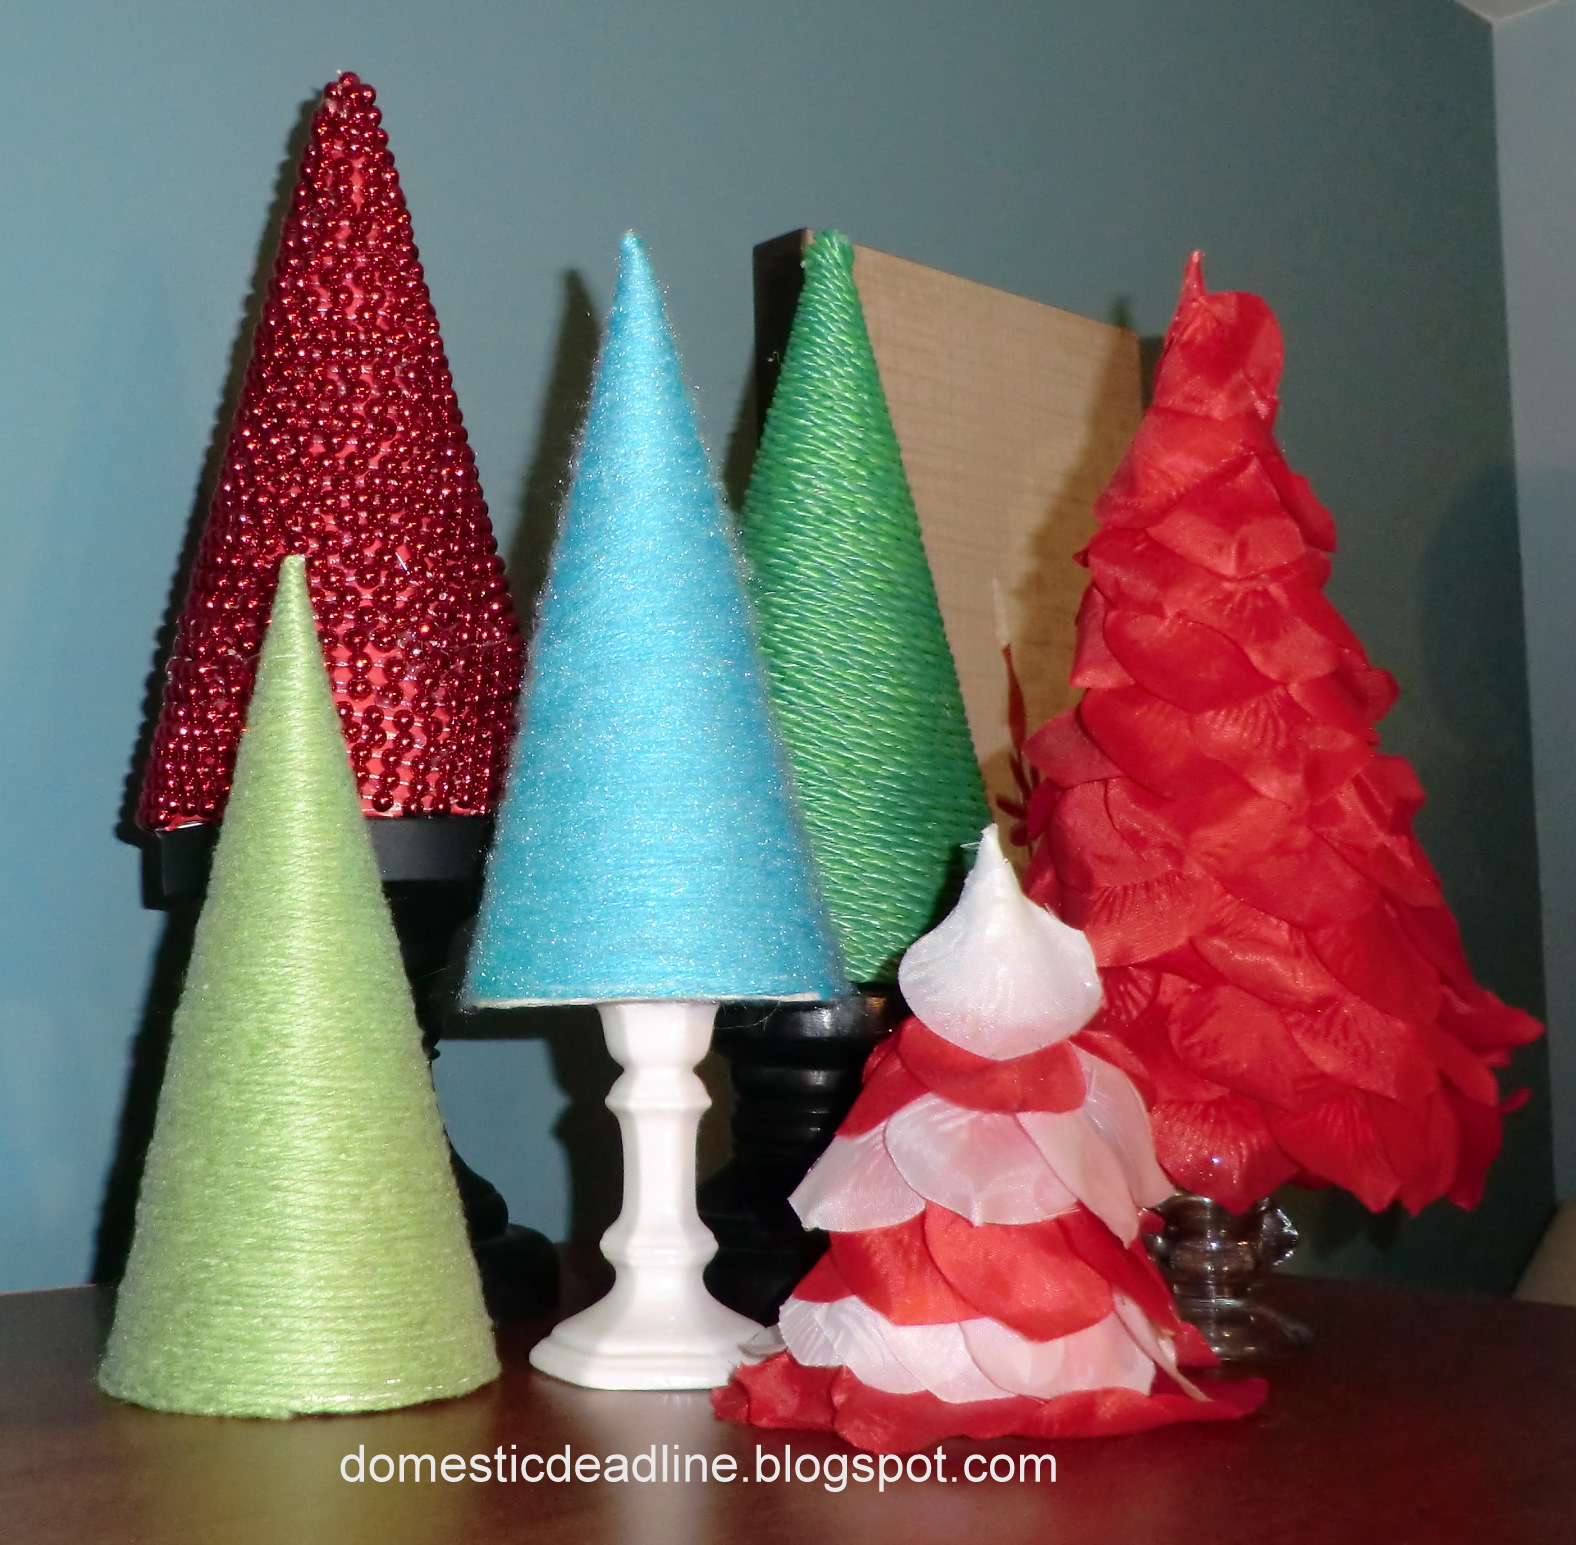
I decorated my "mantle" today. We don't have a fire place but a large entertainment cabinet which has served as a mantle for us (plus a place to put things out of little hand's reach...). I do try to change up this area with the seasons, much like one would do with a real mantle. When I pinned this mantle

by Lisa Leonard a few days ago, I knew it was perfect for me, after all, I'd been working on something similar for a year now. I love the colors and while my trees might not be made from strips of fabric, I already had some made:


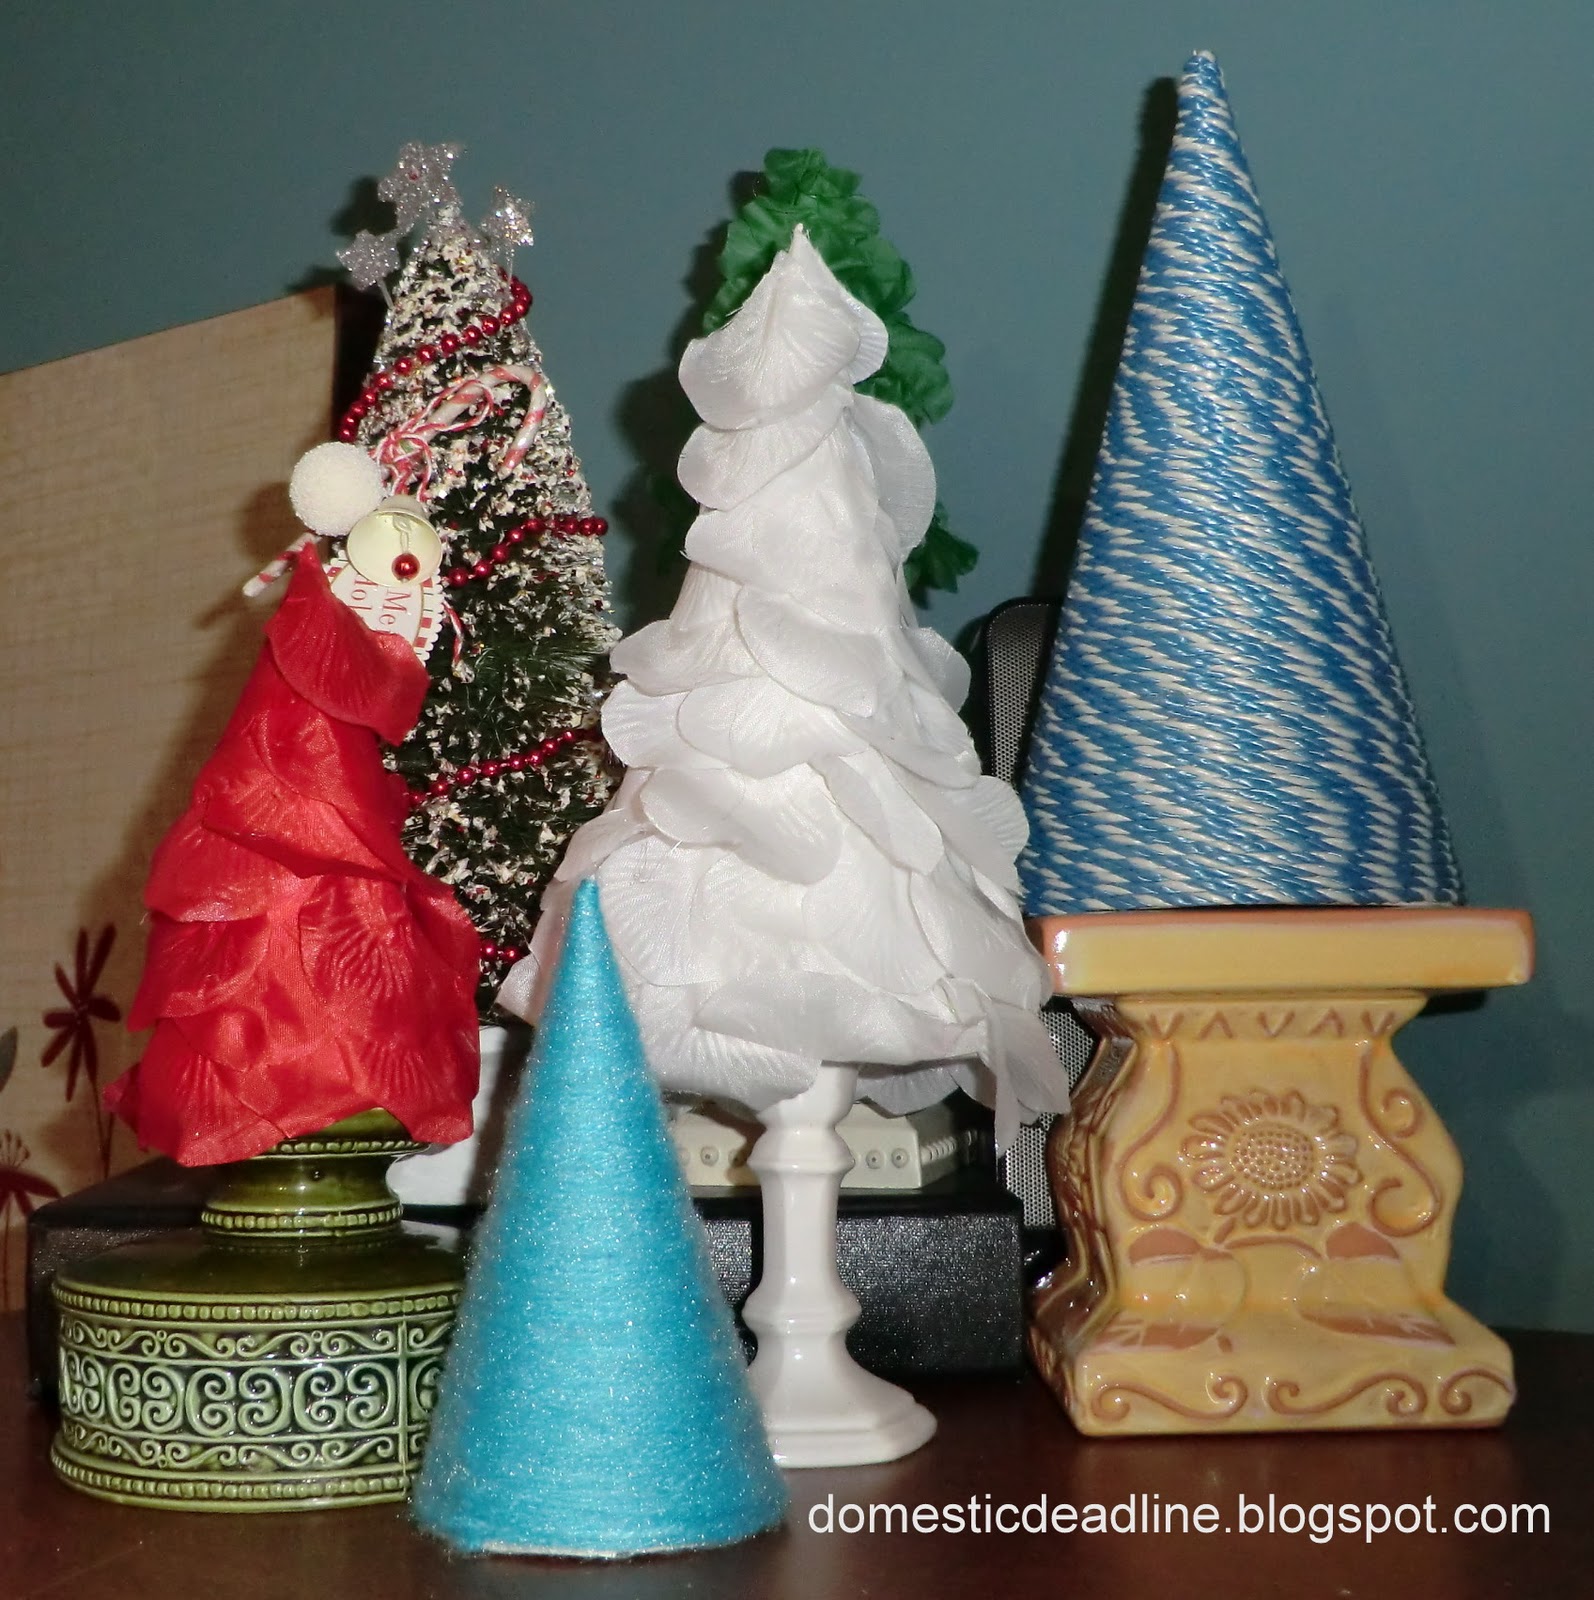
IronFish's PhD book is a permanent riser on our mantle. Had to point out a few things I like below:
 The red petal tree is on top of an upside down pedestal bowl I picked up at the thrift store, just loved the carving. The tree in the center, I found a few years ago at this really cute shop in our down town, Perennial Home, I just loved it and the garland is the same as the tree I covered in it. The tree base of the tree on the far right is also from there. Another item I just love. Originally, it had a lamp shade on top but the lampshade was actually a candle. When I changed the color in our living room, it didn't look right anymore and had seen better days. So I unscrewed the top and have rotated other candles and now a tree on it. I still love it.
Now I just need to figure out what I'm going to hang on the wall in the middle! Any ideas? Guess I'll be back on Pinterest soon!


Now I just need to figure out what I'm going to hang on the wall in the middle! Any ideas? Guess I'll be back on Pinterest soon!
If you like what you
see,
I’d love for you to
follow me!
Peace be with you,

I'll be linking up to some of these parties, stop by and
check out the talent!
M: Made by you Mondays, Made with Love Monday, Making the World Cuter, MMM @ CRAFT, Just something I whipped up, Organizing Mission Monday, Creative Me Monday, A Round Tuit, Motivate me Monday, Jam Hands, Must Try Monday T: Sew Cute Tuesday, Handmade Tuesdays, Tip Me Tuesday, TCB, Topsy Turvy Tuesdays, Take-a-Look Tuesdays, Too Cute Tuesdays, Giggles Glitz & Glam W:
We Did it Wednesday, Night Owl Crafting, Sugar & Spice, Tea Rose Home, We’re Organized Wednesday, What I Wore Wednesday, What’s Up Wednesday, Wow Me Wednesday, Share the Wealth, Real Momma Real Style, Your Whims Wednseday, Whatever Goes T: Make It Wear It, Frogs & Snails, It’s Stinkin’ Cute, Making it with Allie, Things I’ve Done, Everybody’s Creative Endeavor
F: Fun Friday Finds, Fingerprints on the Fridge, It’s a Hodgepodge, Chic on a Shoestring,
Fantastic Friday, TGIF, I’m an Organizing Junkie, Spunky Junky, The Shabby Nest, While He Was Napping, Upcycled Awesome S/S: Get Schooled Saturday,
KISS, Funky Fresh, Weekend Wrap Up, Nifty Thrifty, Creative Bloggers, Six Sisters