Showing posts with label Christmas. Show all posts

12.09.2011

Creating Christmas - Driftwood Tree

 Creating Christmas at The Girl Creative 
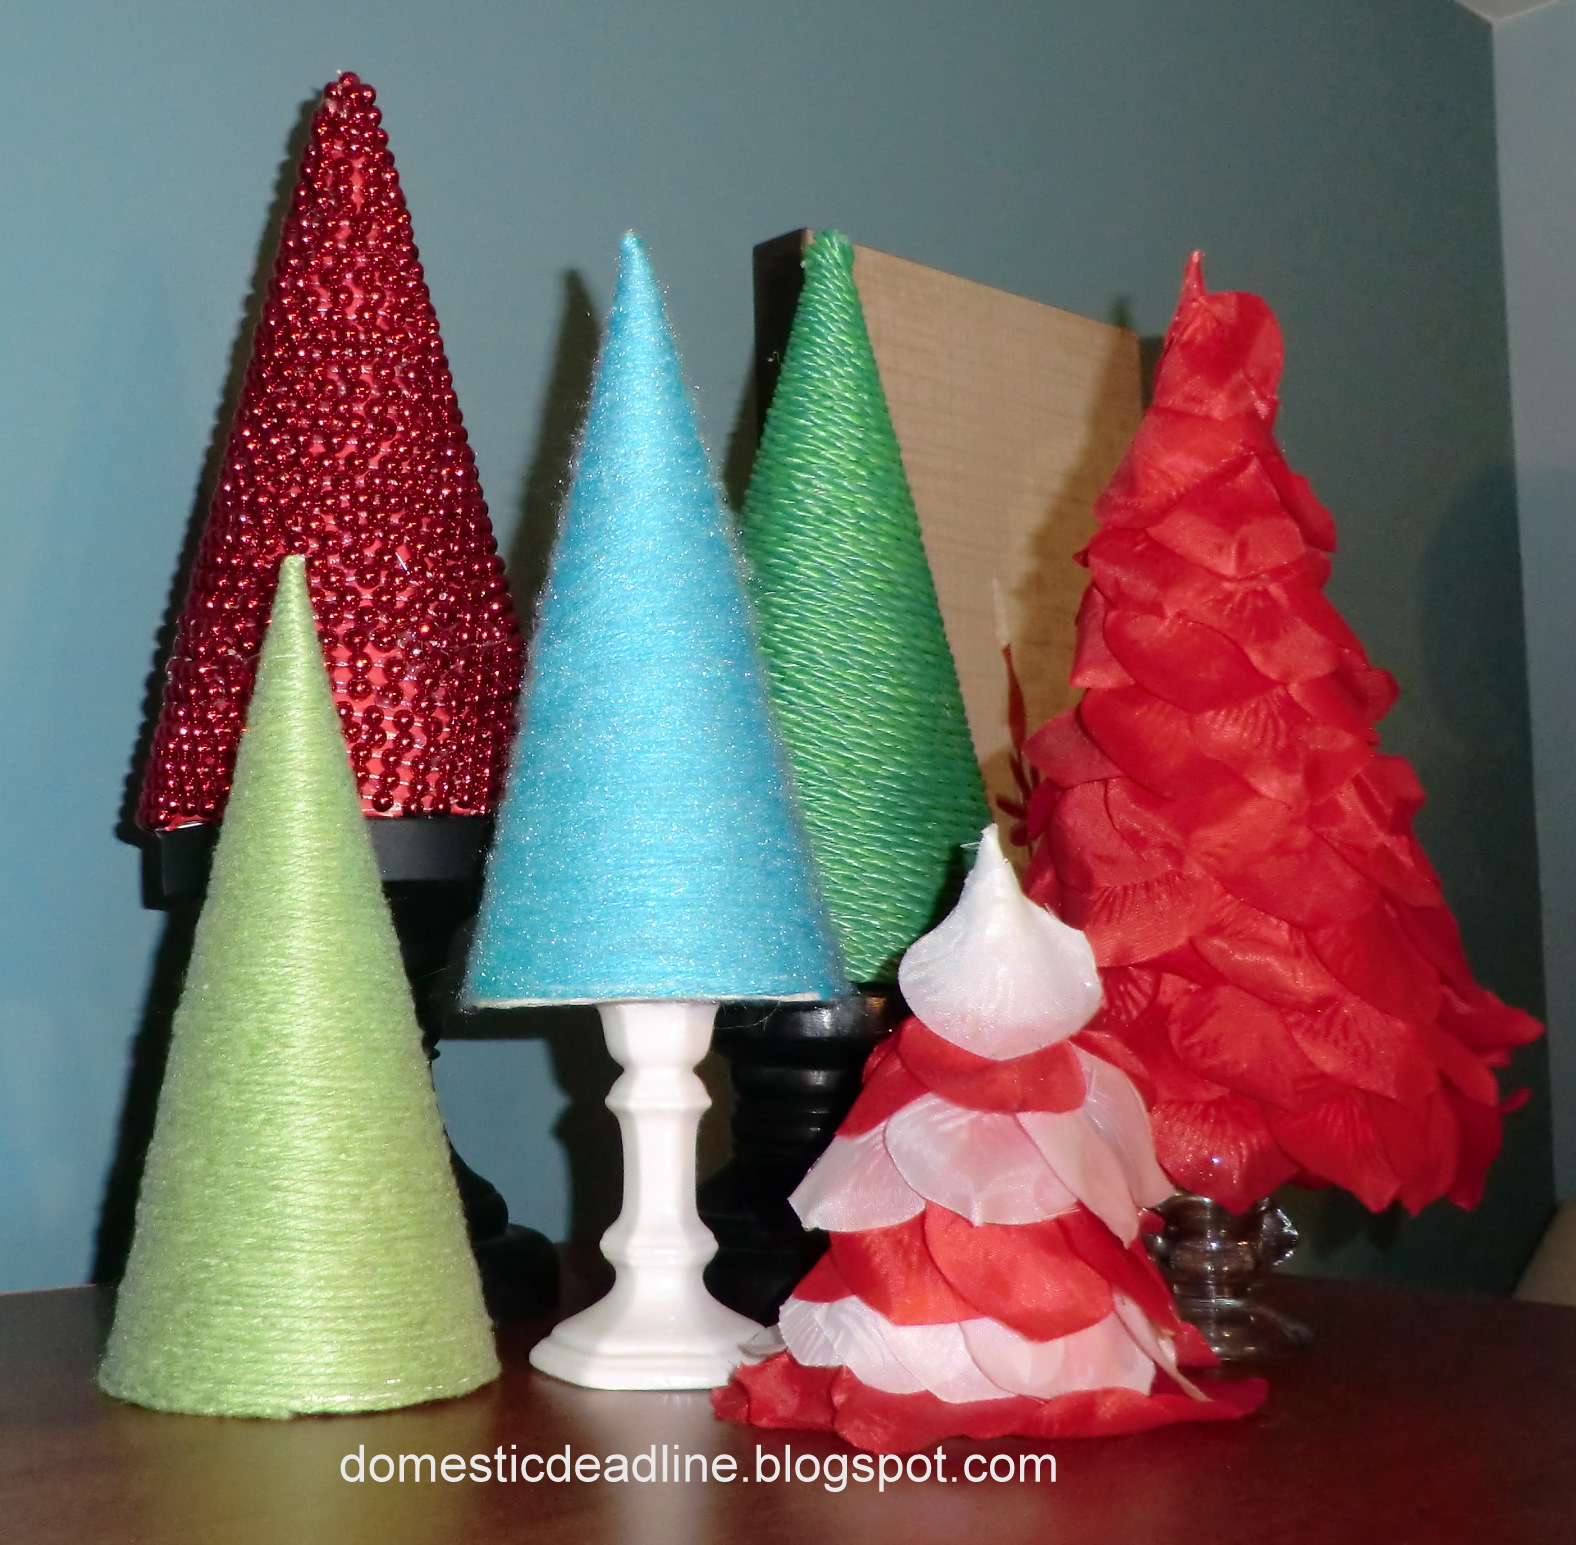
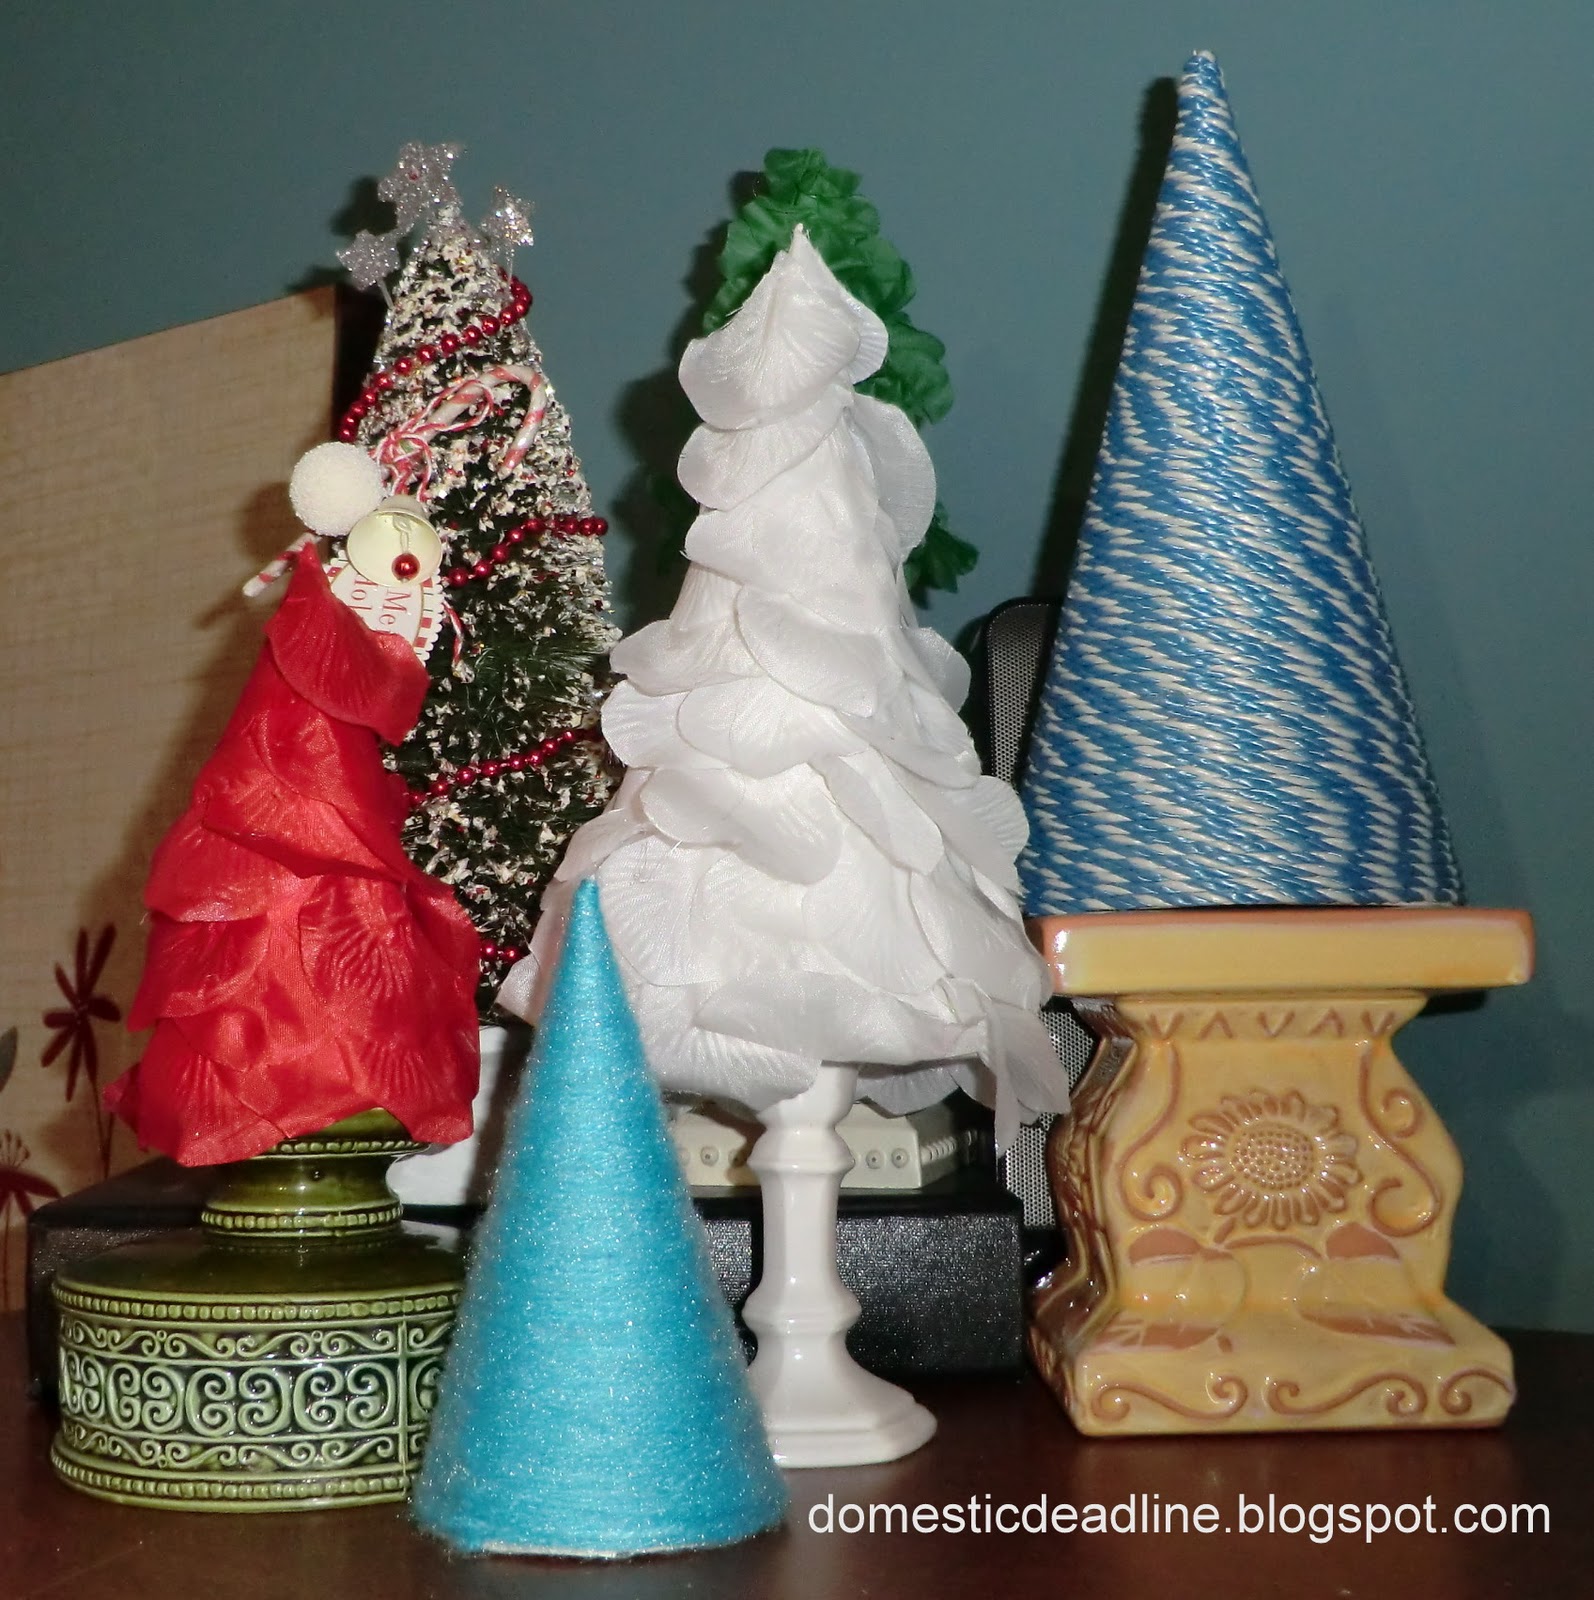
I'm back with one last project for Creating Christmas with The Girl Creative.  Tomorrow is the link party, are you ready?

Today is Day 6, check out Day 1, Day 2Day 3, Day 4 and Day 5 if you need to catch up.

I think Creating Christmas should have started a month ago, I still have so many things that are pinned that I want to make!

Today I pulled out my bag of drift wood from Linwood beach on Lake Erie this past summer.  Over the years I've had lots of ideas of things to do with drift wood, but never had any when I had the idea... and of course never remembered what I wanted to do when I had access to unlimited drift wood, isn't that the way it always is?  But, one day in July, I grabbed a few buckets and had the kids fill them up with tons of it for me and it's been in my basement ever since with this in mind:
But that just wasn't going to happen for me today.  I still want to make this, but it's just going to have to wait.  I've also pinned this pretty piece:

So as I sat with my drift wood, a new idea brewed, and I'm soooooooooo thrilled with the results:
It was really pretty simple.  I covered a canvas board with wrapping paper, a pretty silver and white paper but it needed a punch of red.  Sharpie to the rescue:
  
from this
to this
The girls helped me lay out the drift wood and I glued it in place, making sure to put the glue on the lowest point, ie, where it would touch the canvas.  Once it dried I had to come up with a way to hang it.  It's kind of creative, but really only has to last until my mom and dad come to visit, they are the experts at hanging artwork!  Besides which, my mom is mesmerized by duct tape, so she'll get a kick out of this:
Soda tab, lots of hot glue and a few layers of duct tape... necessity is the mother of invention...

A close up of the final piece:
It is hung a little high, but the hook was already on the wall... and I think my colorful forest might still grow...


If you like what you see,
I’d love for you to follow me!
Peace be with you,
 

I'll be linking up to some of these parties, stop by and check out the talent!
M: Made by you Mondays, Made with Love Monday, Making the World Cuter, MMM @ CRAFT, Just something I whipped up, Organizing Mission Monday, Creative Me Monday, A Round Tuit, Motivate me Monday, Jam Hands, Must Try Monday T: Sew Cute Tuesday, Handmade Tuesdays, Tip Me Tuesday, TCB, Topsy Turvy Tuesdays, Take-a-Look Tuesdays, Too Cute Tuesdays, Giggles Glitz & Glam W: We Did it Wednesday, Night Owl Crafting, Sugar & Spice, Tea Rose Home, We’re Organized Wednesday, What I Wore Wednesday, What’s Up Wednesday, Wow Me Wednesday, Share the Wealth, Real Momma Real Style, Your Whims Wednseday, Whatever Goes T: Make It Wear It, Frogs & Snails, It’s Stinkin’ Cute, Making it with Allie, Things I’ve Done, Everybody’s Creative Endeavor F: Fun Friday Finds, Fingerprints on the Fridge, It’s a Hodgepodge, Chic on a Shoestring, Fantastic Friday, TGIF, I’m an Organizing Junkie, Spunky Junky, The Shabby Nest, While He Was Napping, Upcycled Awesome S/S: Get Schooled Saturday, KISS, Funky Fresh, Weekend Wrap Up, Nifty Thrifty, Creative Bloggers, Six Sisters

12.08.2011

Creating Christmas - Just a Little Something

Hi All, just popping in to show you a sample of the hair bows turned tree decor (if you can't beat them... join them).  Little man has walking pneumonia, so even though I'm stuck at home with him... I haven't been able to get some of my ideas done! 

Oh well, I've been making some hair flowers as we call them, and tried a few with Christmas fabric scraps (ironically they match my tree skirt).  I think they turned out really cute:
O-man got off my lap long enough to clip it to our Christmas tree...

I've decided not to bother with "don't touch the tree" they are all having fun with it and that's what counts.  So, hair flowers have become tree flowers... the hair clip makes it stay on the tree nicely... maybe he's got something here!

Catch up on the previous Creating Christmas posts here.  I'm hopeful to get more done tomorrow...

Peace be with you,
 

12.07.2011

Creating Christmas - A Year in the Works Mantle

 Creating Christmas at The Girl Creative
Another day of Creating Christmas with The Girl Creative!  I'm having so much fun with this, and I really hope you are too!  Have you been checking out all the other lovely co-hosts?  I hope you do, these ladies have some wonderful ideas to share.  Check them out:


Today is Day 4, check out Day 1, Day 2 and Day 3 if you need to catch up.

I decorated my "mantle" today.  We don't have a fire place but a large entertainment cabinet which has served as a mantle for us (plus a place to put things out of little hand's reach...).  I do try to change up this area with the seasons, much like one would do with a real mantle.  When I pinned this mantle 

by Lisa Leonard a few days ago, I knew it was perfect for me, after all, I'd been working on something similar for a year now.  I love the colors and while my trees might not be made from strips of fabric, I already had some made:
   
When I originally made these, I did avoid making them specific to one holiday with the intention of being able to mix and match them to use for Christmas and other holidays.  The feather one didn't hold up so well in storage, and of course I had to add a few more.  So here's my version:
I wrapped a few more trees in yarn and while I love the original version with white candle holders, I just went with some that I had on hand.  Here's a few close ups:
The red one in the back on the left (above), is made from a strand of the beaded garland, I wrapped the cone in red wrapping paper first.  I've been picking up candle sticks from the thrift store when I can get them for about a quarter.
IronFish's PhD book is a permanent riser on our mantle.  Had to point out a few things I like below:
The red petal tree is on top of an upside down pedestal bowl I picked up at the thrift store, just loved the carving.  The tree in the center, I found a few years ago at this really cute shop in our down town, Perennial Home, I just loved it and the garland is the same as the tree I covered in it.  The tree base of the tree on the far right is also from there.  Another item I just love.  Originally, it had a lamp shade on top but the lampshade was actually a candle.  When I changed the color in our living room, it didn't look right anymore and had seen better days.  So I unscrewed the top and have rotated other candles and now a tree on it.  I still love it.

Now I just need to figure out what I'm going to hang on the wall in the middle!  Any ideas?  Guess I'll be back on Pinterest soon!
  If you like what you see,
I’d love for you to follow me!

Peace be with you,
 

I'll be linking up to some of these parties, stop by and check out the talent!
M: Made by you Mondays, Made with Love Monday, Making the World Cuter, MMM @ CRAFT, Just something I whipped up, Organizing Mission Monday, Creative Me Monday, A Round Tuit, Motivate me Monday, Jam Hands, Must Try Monday T: Sew Cute Tuesday, Handmade Tuesdays, Tip Me Tuesday, TCB, Topsy Turvy Tuesdays, Take-a-Look Tuesdays, Too Cute Tuesdays, Giggles Glitz & Glam W: We Did it Wednesday, Night Owl Crafting, Sugar & Spice, Tea Rose Home, We’re Organized Wednesday, What I Wore Wednesday, What’s Up Wednesday, Wow Me Wednesday, Share the Wealth, Real Momma Real Style, Your Whims Wednseday, Whatever Goes T: Make It Wear It, Frogs & Snails, It’s Stinkin’ Cute, Making it with Allie, Things I’ve Done, Everybody’s Creative Endeavor F: Fun Friday Finds, Fingerprints on the Fridge, It’s a Hodgepodge, Chic on a Shoestring, Fantastic Friday, TGIF, I’m an Organizing Junkie, Spunky Junky, The Shabby Nest, While He Was Napping, Upcycled Awesome S/S: Get Schooled Saturday, KISS, Funky Fresh, Weekend Wrap Up, Nifty Thrifty, Creative Bloggers, Six Sisters

12.05.2011

Creating Christmas - Mitten Pillow

 Creating Christmas at The Girl Creative
Welcome to Day 3 of Creating Christmas with The Girl Creative.  Check out Day 1 and Day 2 if you missed them.

The point of Creating Christmas is to not just pin something, create something.  Like the rest of you, I've been pinning tons of things that give me inspiration and have a whole Pinterest board dedicated to all the awesome Christmas ideas that have inspired me.


One particular idea that I decided needed to be created is the mitten pillow in the back of this picture:
 
The $69 price tag is a little steep for me and since mittens can go for the whole winter season, I'd rather go with my color scheme and my winter pillows that I made last year from thrift store sweaters
Originally I planned on going through my fabric scraps, but a fever left the little man in my lap yesterday and while I've sewed with him in my lap before, he just wasn't up for that... crocheting it is then!  Don't worry, I used yarn scraps.  Now, bear with me, I have never really written a crochet pattern before.  I made the first one up as I went along, wrote it down, and then tried to follow it.  Please feel free to ask any questions.

Crochet Mini Mittens:
With worsted weight yarn and an H hook, chain 12.
sc = single crochet, HDC = half double crochet, DC = double crochet
Row 1: in 2nd ch from end, DC, counts as 1st stitch.  DC to end, 11 stitches, turn
Row 2 of the thumb: ch 2, DC in next 2 DC, turn
Row 3: HDC, DC, HDC, turn
Row 4: Repeat row 3, turn
Row 5: 3 HDC, turn
Row 6: SC to the end and down around the inside of the thumb back down to Row 1 and slip stitch to connect, turn
Rows 2-5 of hand:  ch 2, DC to end, 8 stitches, turn

Row 6-7:  sc, HDC, 4 DC, HDC, sc, turn
Row 8: sc, 5 HDC, sc to end and down the hand back to the base (no real count, some DCs I did 2 stitches, some only 1, just watch that it lays flat).
Row 9-10: ch 2, DC to end, about 10 stitches, make sure it lays flat, this is the palm portion of the mitten.
Optional: add a row of fringe or an alternate color.
I love the burlap of the pinned version, but muslin was available.  Since I'm constantly stash busting and trying to use what I have and not buy something new, muslin it is!  Plus, it's softer anyways.  I'm thrilled with the result, yes, it needs a bit more stuffing, just have to find where I put it.
Plus, it looks great with my other pillows:
Now it's time to go back to Pinterest and see what else I pinned that needs to be created this week!

If you like what you see,
I’d love for you to follow me!
Peace be with you,
 
I'll be linking up to some of these parties, stop by and check out the talent!
M: Made by you Mondays, Made with Love Monday, Making the World Cuter, MMM @ CRAFT, Just something I whipped up, Organizing Mission Monday, Creative Me Monday, A Round Tuit, Motivate me Monday, Jam Hands, Must Try Monday T: Sew Cute Tuesday, Handmade Tuesdays, Tip Me Tuesday, TCB, Topsy Turvy Tuesdays, Take-a-Look Tuesdays, Too Cute Tuesdays, Giggles Glitz & Glam W: We Did it Wednesday, Night Owl Crafting, Sugar & Spice, Tea Rose Home, We’re Organized Wednesday, What I Wore Wednesday, What’s Up Wednesday, Wow Me Wednesday, Share the Wealth, Real Momma Real Style, Your Whims Wednseday, Whatever Goes T: Make It Wear It, Frogs & Snails, It’s Stinkin’ Cute, Making it with Allie, Things I’ve Done, Everybody’s Creative Endeavor F: Fun Friday Finds, Fingerprints on the Fridge, It’s a Hodgepodge, Chic on a Shoestring, Fantastic Friday, TGIF, I’m an Organizing Junkie, Spunky Junky, The Shabby Nest, While He Was Napping, Upcycled Awesome S/S: Get Schooled Saturday, KISS, Funky Fresh, Weekend Wrap Up, Nifty Thrifty, Creative Bloggers, Six Sisters

Creating Christmas - Patchwork Tree Skirt


 Creating Christmas at The Girl Creative  
It's Day 2 of  Creating Christmas at The Girl Creative.  If you missed my day one, check it out here.  What have you been making?

A good 20 years ago, I made a tree skirt for my mom for Christmas.  The previous one she had made but it was ruined in a minor basement flood.  I'm pretty sure she's still using the one I made; 5 feet in diameter made from 9 inch blocks and reversible.  Then a few years back, SisterBaby asked me to make her one for Christmas.  When I was visiting, we shopped for a variety of Christmas fabric, enough to make one for each of us... after all, if I'm going to make her one, I might as well make myself one right?

Flash forward to the present, and I'm still getting requests for them!  Bummed that I forgot to take a picture of the one I just shipped off...  I now keep a zip lock bag of pre-cut squares... whenever I have scraps of Christmas fabric, I cut the squares and tuck them into the bag until I'm ready to make another one. 

Below is the one I made for myself, SisterBaby's matches mine. We started with the penguin fabric and went from there.  Our Grandma Marj loved penguins and we liked the blues, this is the fun kid friendly side:
 
I like to make the backside one fabric, a bit more traditional.
 Both sides:
Tree skirts aren't just for Christmas anymore... I've been giving them for wedding gifts the past few years... and according to O-man it makes a great cape... I just can't get a good picture of him wearing it!

If you like what you see,
I’d love for you to follow me!
Peace be with you,
 

I'll be linking up to some of these parties, stop by and check out the talent!
M: Made by you Mondays, Made with Love Monday, Making the World Cuter, MMM @ CRAFT, Just something I whipped up, Organizing Mission Monday, Creative Me Monday, A Round Tuit, Motivate me Monday, Jam Hands, Must Try Monday T: Sew Cute Tuesday, Handmade Tuesdays, Tip Me Tuesday, TCB, Topsy Turvy Tuesdays, Take-a-Look Tuesdays, Too Cute Tuesdays, Giggles Glitz & Glam W: We Did it Wednesday, Night Owl Crafting, Sugar & Spice, Tea Rose Home, We’re Organized Wednesday, What I Wore Wednesday, What’s Up Wednesday, Wow Me Wednesday, Share the Wealth, Real Momma Real Style, Your Whims Wednseday, Whatever Goes T: Make It Wear It, Frogs & Snails, It’s Stinkin’ Cute, Making it with Allie, Things I’ve Done, Everybody’s Creative Endeavor F: Fun Friday Finds, Fingerprints on the Fridge, It’s a Hodgepodge, Chic on a Shoestring, Fantastic Friday, TGIF, I’m an Organizing Junkie, Spunky Junky, The Shabby Nest, While He Was Napping, Upcycled Awesome S/S: Get Schooled Saturday, KISS, Funky Fresh, Weekend Wrap Up, Nifty Thrifty, Creative Bloggers, Six Sisters

12.04.2011

Creating Christmas - DIY Half Tree

 Creating Christmas at The Girl Creative
It's Day 1 of Creating Christmas at The Girl Creative and I'm co-hosting with 14 other awesome bloggers!

As my family has grown, our need for every day storage has grown... this means the space for a Christmas tree has greatly reduced.  O-man is close to 4 but still very curious about, well, everything.  These two problems were resolved the past two years by using a 4 foot tree on top of a table, aka, out of his reach and small space friendly.

But, I've been promising the girls we would use a regular size tree again this year.  As I contemplated where to put our mammoth tree (artificial for us, allergies) I looked into getting a new skinnier tree.  Alas, it just didn't seem worth them money, especially since what I really wanted was a flat back/half/wall tree (different places called them different names).  Have you seen these things? So cool and totally space saving.

Wait a minute... my tree comes in multiple pieces, it shouldn't really matter if I use all of them, right?  Well, since the tree I ultimately wanted was $400, I figured it was worth a try!  Since it worked, I wish I'd taken step by step pictures.  But, I didn't so I'll give you the directions.
Step 1:  If your branches are not pre-sorted (thanks IronFish) from putting it away the last time, sort them by size now.  In my fake tree experience, they are color coded and usually come with a diagram which basically tells you, the largest ones go on the bottom and the mini tree looking thing is the ready to go top.
Step 2:  Assemble your base and center pole (we store our center pole as one piece since I wrapped extra garland around it when we first got it, otherwise it would break down into 2 pieces).  Push it back into a corner or against a wall as close as it will get to the wall(s).
Step 3:  Find the very bottom row where the longest branches are supposed to go.  Now put those branches back in the box, and the branches of one row up also.  Look at all that space you've saved already!  My bottom row has a diameter of over 5 feet, not using the bottom two rows saved me 2 feet in diameter.  The first branches we are going to use will be the normal 3rd row.  My picture is labeled with the new rows.
Step 4:  Remember that very bottom row, leave it completely empty.  More space under the tree for presents (or the 3 year old playing under it).  Our new bottom row is the next one up.  Take those 3rd row branches, put half on the new bottom row and half on the new row 2, only on the front.  Fluffing your branches as you go.
Step 5:  The original 4th row branches are the new row 3, use half of your branches again on the front half.  Put the rest away.
Step 6:  The height of your tree will determine how many rows you have.  As you move up the tree, you will be using the next size up, but only half of them.  My rows 4 and 5.
Step 7:  Now, my tree is pushed up against a cabinet.  I did a little rearranging so we can survive the next month without accessing what is inside, it just has to be there, I have no other place for it.  Since my tree is not completely against the wall, I used all the branches of rows 6 to 7, you may want to depending on how it looks.
Step 8:  Put your top on and decorate!!!!!

IronFish has a system for putting the tree together.  This definitely didn't follow his system, but I'm happy to say, he was very pleased that we managed to make the tree more space saving.

I know, the decorations are pretty interesting, O-man started adding his toys right away and they have just been so proud, I've let them continue to play with the tree.  Christmas should be a joyful time, so if moving toys around makes them happy, I'm not going to complain:
He's most proud of this decoration:
 
Don't worry, it's clean, I gave in and got him his own, he invents all kinds of games with his plunger.  
If you like what you see,
I’d love for you to follow me!

Peace be with you,
 

I'll be linking up to some of these parties, stop by and check out the talent!
M: Made by you Mondays, Made with Love Monday, Making the World Cuter, MMM @ CRAFT, Just something I whipped up, Organizing Mission Monday, Creative Me Monday, A Round Tuit, Motivate me Monday, Jam Hands, Must Try Monday T: Sew Cute Tuesday, Handmade Tuesdays, Tip Me Tuesday, TCB, Topsy Turvy Tuesdays, Take-a-Look Tuesdays, Too Cute Tuesdays, Giggles Glitz & Glam W: We Did it Wednesday, Night Owl Crafting, Sugar & Spice, Tea Rose Home, We’re Organized Wednesday, What I Wore Wednesday, What’s Up Wednesday, Wow Me Wednesday, Share the Wealth, Real Momma Real Style, Your Whims Wednseday, Whatever Goes T: Make It Wear It, Frogs & Snails, It’s Stinkin’ Cute, Making it with Allie, Things I’ve Done, Everybody’s Creative Endeavor F: Fun Friday Finds, Fingerprints on the Fridge, It’s a Hodgepodge, Chic on a Shoestring, Fantastic Friday, TGIF, I’m an Organizing Junkie, Spunky Junky, The Shabby Nest, While He Was Napping, Upcycled Awesome S/S: Get Schooled Saturday, KISS, Funky Fresh, Weekend Wrap Up, Nifty Thrifty, Creative Bloggers, Six Sisters

11.29.2011

Avoiding the Over Commercialization of Christmas

I love Christmas, I really do.  I don't however love the over commercialization of it.  Christmas is about the celebration of the birth of Jesus Christ.  If you disagree with me, feel free to stop reading here.

Don't worry, I don't ruin Santa Claus for my children, I just don't make him the main reason for the season.  I still remember the first time my oldest daughter asked me why some people get anything they want for Christmas.  Here is our story:

Every mom and dad gets to make a contract with Santa before their first child's first Christmas.  Santa brings one special present and some stocking stuffers.  It's easy to tell what Santa brought because he wraps his gifts in paper with his picture or big presents are sometimes unwrapped.  Gifts from others usually have snowmen, candy canes, etc.  Santa brings gifts to children but puts something in everyone's stocking, no matter how young or old.

Christmas is Jesus' birthday and we give gifts to celebrate.  On his birth, Jesus received a gift from each of the three wise men.  To help us remember this, Mom and Dad give each child only 3 gifts to represent the gold, frankincense and myrrh. 
Gold = Garment (an item of clothing)
Frankincense = Fun (game, toy, music, etc)
Myrrh = Mind (something educational: book, puzzle, etc)
Mom and Dad sometimes also like to pick up a few extra things for the stockings.  Grandparents and other relatives are allowed to give my kids gifts, I just ask that they don't go too crazy as it is important to not become greedy.  I also really like the kids to think about what they want to give to others and why.

And finally, a tradition started by my Grandma Marj, the Santa Mouse leaves a gift on the end of each child's bed.  When you wake up in the morning, you can open this gift and play with it until Mom and Dad are ready for everyone to come down stairs.

IronFish thinks I have too many "rules" for Christmas, but I think it is important to have our family's guidelines so we don't get carried away with the commercialism that seems to start earlier and earlier every year.  What are your Christmas rules traditions?

If you like what you see,
I’d love for you to follow me!


Peace be with you,
 

I'll be linking up to some of these parties, stop by and check out the talent!
Related Posts Plugin for WordPress, Blogger...