
I did a guest post over at This Crazy Blessed Life last week, in case you missed it, check it out below.
Hi, I'm Emily from Domestic Deadline. I'm so excited to be sharing my Lilly Pulitzer inspired upcycle with everyone following along the Sew Chic Upcycle Week. I truly think upcycle projects are my favorite, there is something so satisfying about making a cast off new again.
Here's what you'll need:
a long skirt (mine had a fitted waist with a zipper and consisted of a sheer layer over a white lining),
double fold bias tape (I made mine, but purchased is fine too!),
basic sewing supplies.
Let's get started!
While on vacation, I hit the thrift stores a few too many times. One of those times I found this skirt. While I thought it was a beautiful color, it didn't quite fit me and I really don't like long skirts or dresses on me. It definitely had potential though so at $4.35, I snatched it up.

I liked this gathered detail, simple, but a fun extra.

First things first, remove the waist band, simply cut it off close to the seam. Since mine had a zipper, I opened it up, cut through it and dealt with it a bit later.

Next, if your skirt has multiple layers or any gathering that you want to keep, be sure to pin as you cut.

Once the waist band is removed, run a quick zig zag around the top to keep the layers and gathering together

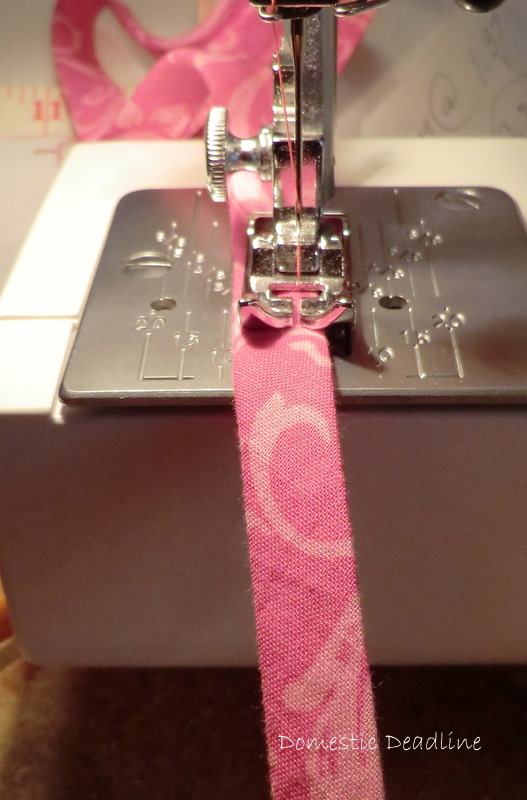
Time to open up that bias tape! Pin and stitch to cover where you just zig zagged, this is now the top of your dress.

If you have a zipper, be sure to cover the top with bias tape (I'm sure there is a prettier way to do this, but...). This will act as a stopping place when closing the zipper and keep the cut zipper from scratching. Not pictured, I had a hook and eye at the top of my zipper originally. I removed it when I took off the waist band and re-attached it here.

Back to that waist band! Cut the band into two equal parts and serge or zig zag the ends. If your waist band has any folded under fabric or inter facing here, remove it now (just trust me on this...)

Time to add a bit more of that bias tape to the open edge of your straps like so:

Next, pin your straps in place. I personally like my dress straps to cover my bra straps. I've learned to try the dress on, pin them in place, baste the straps on, try the dress on again and then sew them in place. The extra time is well worth it...

Optional, make a belt. You can use bias tape (pictured below), which I did first, however I later decided I wanted a thicker belt, so I used a 5 inch wide strip of fabric, ironed it like double folded bias tape and top stitched it (sorry, didn't photo this, but it looks the same as below except wider)
Tie your belt on and you're good to go!

Ok, here's a picture of me in it (I'm dealing with the photography skills of my 9 year old, which means 20 pictures later, I take the lesser evil....)

Here is my original inspiration:

Lilly's Addie dress is $198... Since I made my bias tape from left over fabric, I'd say I saved $193.65!
Please stop over and say hi! I've got several more upcycled projects on my cutting table to share soon...
Peace be with you,

I'll be linking up to some of these parties, stop by and check out the talent!
M: Made by you Mondays, Made with Love Monday, Making the World Cuter, MMM @ CRAFT, Just something I whipped up, Organizing Mission Monday, A Round Tuit, Motivate me Monday, Sharing Monday T: Sew Cute Tuesday, Handmade Tuesdays, Tip Me Tuesday, TCB, Topsy Turvy Tuesdays, Take-a-Look Tuesdays, Too Cute Tuesdays, Giggles Glitz & Glam, It’s Sew fun Tuesday W: We Did it Wednesday, Night Owl Crafting, Sugar & Spice, Tea Rose Home, Upcycled Awesome, We’re Organized Wednesday, What I Wore Wednesday, What’s Up Wednesday, Wow Me Wednesday, Share the Wealth, T: Make It Wear It, Frogs & Snails, It’s Stinkin’ Cute, Making it with Allie F: Fun Friday Finds, Fingerprints on the Fridge, It’s a Hodgepodge, Chic on a Shoestring, Fantastic Friday, TGIF, I’m an Organizing Junkie, Spunky Junky, The Shabby Nest, While He Was Napping S/S: KISS, Funky Fresh, Weekend Wrap Up, Nifty Thrifty
5 comments:
CUTE!
I found you at the pleated poppy...and I love this dress!
I love Lily, but she is so expensive, I never thought to make my own (duh!).
Good job!
Beautiful dress! I never think to refashion clothes for myself as I always want to transform it into a baby dress. Great idea!
AWW! Wow, to cute :) Please stop by to see my giveaway! There are 11 different prizes and for every entry I will donate 50 cents to the winners chosen charity! I am your newest follower :)
hugs! Hannah from www.hannahhandmade.blogspot.com
Great job! You look beautiful :) I can just imagine your 9 year old taking pictures. *LOL*
Post a Comment